Monitor calibration is an
interesting topic, but it can certainly get very complicated and confusing for
the the average user. There's a whole host of information out there on the
internet if you want to know more about colour management, profiling, colour
matching, colour spaces etc. We
hope that the following review and article is useful for those wanting to get
more from their screen and wanting to understand the topic in some more detail.
We have reviewed several monitor calibration devices and several different
software packages in the past and we now have X-rites high end i1 Pro (aka
Eye-One Pro) device here for testing and review. This review is also hopefully
useful for those interested in purchasing one of the various i1 Pro packages.
I wanted to start by explaining a bit about the
two different types of calibration device you can buy, those being colorimeters
and spectrophotometers (aka spectroradiometers):
-
Colorimeters -
A
tri-stimulus colorimeter measures the colour of a display by using three
separate sensors to measure red, green, and blue. Each of the sensors sits
behind a filter that isolates a particular colour. Using a tri-stimulus
colorimeter is conceptually equivalent to using a normal white light meter and
putting different filters on it for measuring different colours. Most mainstream
devices you will hear about are colorimeters. These vary in quality and
performance, but just because they are colorimeters does not necessarily make
them unreliable.
-
Spectrophotometers (aka
spectroradiometers)
-
on the
other hand reads light completely differently. It does not rely on filters as a
way of mimicking human colour vision, but rather measures the spectra of a
display directly in small bands and uses an industry standard formula to
calculate the red, blue and green response. What you see is what you get! Its
accuracy depends only on the bandwidth, sensitivity, and resolution of the
device. This is why (generally speaking) spectroradiometers don't care what sort
of display you're measuring. They are particularly useful if you need to measure
and profile many different devices and displays of different types.
The i1 Pro is a very highly regarded
spectrophotometer device for those wanting something more than a consumer grade
colorimeter. The cost of the package is considerably higher than a mainstream
colorimeter. This review will look at the hardware device itself, the package it
comes in, and will then test several pieces of calibration software including
the packaged i1 Match. It should be noted that the i1 Pro range is currently
going through a major update and will soon be available with the new "i1
Professional Color Management Solutions". We have spoken to X-rite who
confirmed the device itself will remain unchanged, but these packages will
feature a new software solution which we will be testing as well in due course.
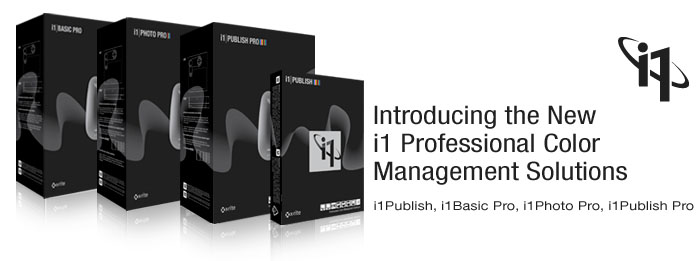
Review coming
soon of the new software package

Specification


For those whoe are interested in the detail, the
spec of the i1 Pro hardware device is as follows. The device we have for testing
is a Revision D model:
|
Spectral analyzer |
Holographic diffraction grating with 128-pixel diode array |
Interface |
USB 1.1 |
|
Optical resolution |
10nm |
Physical dimensions |
Length 151mm, width 66mm, height 67mm (6 x 2.6 x 2.6 inches) |
|
Physical sampling interval |
3.5nm |
Weight: |
185g (6.5oz) |
|
Spectral data |
Range: 380 ... 730 nm in 10nm steps |
Accessories included |
Calibration plate, USB cable, monitor holder, positioning target, scanning
ruler, and
light measurement head |
|
Measurement aperture |
4.5mm diameter |
Physical filters: |
No or UV cut (Filters not exchangeable) |
|
Measurement geometry |
45°/0° ring illumination optics, DIN 5033 |
Type |
Cosine-corrected diffuse light measurement head |
|
Light source |
Gas filled tungsten (Type A) |
Diameter |
6.0 mm |
|
Data format: |
Spectral radiance (mW/nm/m2 /sr); Luminance Y (cd/m2) |
Data format |
Spectral irradiance (mw/nm/m2), Illuminance Y (lux) |
|
Measurement range |
0.2 - 300 cd/m2 |
Power supply: |
Device powered by USB. No additional charger or battery required. USB 1.1
high power device. |
-
Inter-instrument agreement:
Average DE*94 0.4, max. DE*94 1.0 (Deviation from X-Rite manufacturing standard
at 23°C for single measurement mode on 12 BCRA tiles (D50,2°)
-
Short-term repeatability: DE*94
<= 0.1 (D50,2°), with respect to the mean CIELab value of 10 measurements every
3 seconds on white
Note that one limitation of this spectrophotometer
is that the measurement range is not massive. It can only read down to 0.2 cd/m2
with good accuracy which as a modern black point, is not that low. A decent
colorimeter device (e.g. X-rite i1 Display 2) would offer a better range, and is
rated down to 0.02 cd/m2.
At the high end, the maximum reading is 300
cd/m2
whereas the i1 Display 2 is rated up to 3000
cd/m2.
i1 Extreme Package
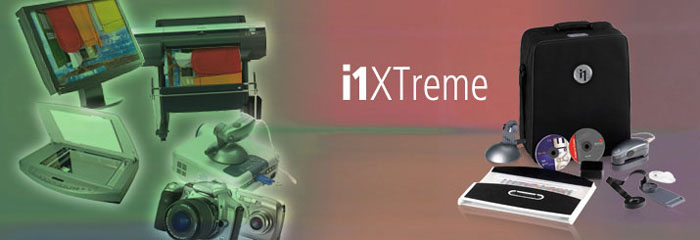
For this review, X-rite have kindly sent us the
complete "i1 Extreme"
package which is very comprehensive. Their website says the following about
this package: "i1XTreme is a comprehensive solution
that meets all your primary color control needs to implement a complete
end-to-end color managed workflow. The industry-standard i1 Pro is the only
measuring device necessary for both emissive (monitors) and reflective (print)
profiling, giving you complete control over each device in your digital
workflow. If you require UV filtration, a UV cut version is also available.
The i1XTreme system is comprehensive enough to be the only color management
solution you’ll ever need. Use it to profile your monitors, scanners, digital
cameras (with the optional ColorChecker Digital SG), and RGB and CMYK printers.
True colors on each of your LCD, CRT and laptop monitors."
With i1XTreme you'll have complete color control at your fingertips.
-
Industry-standard spectrophotometer for both
emissive (monitors) and reflective (print) profiling.
-
Use it to profile your monitors, scanners, digital cameras (with the
optional ColorChecker Digital SG), and RGB and CMYK printers.
-
USB powered, so extra power cable is not required
-
i1Extreme is available in either NoFilter and UVcut. Purchase according to
your workflow requirements.
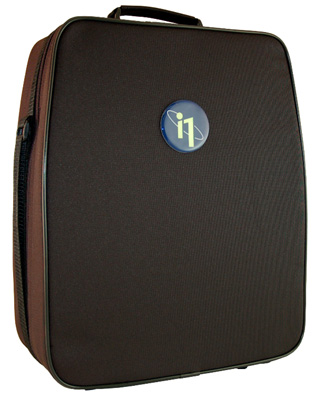

The package comes in a big mini-suitcase sized
bag as shown above. It's sturdy and well made and holds a lot of different bits
of kit. Inside you will find:
|
i1 Pro spectroradiometer / spectrophotometer (measurement device) |
 |
|
USB cable |
 |
|
Ambient light measurement
head |
 |
|
Monitor holder |
 |
|
Positioning target |
 |
|
Scanning ruler
and backup board |
 |
|
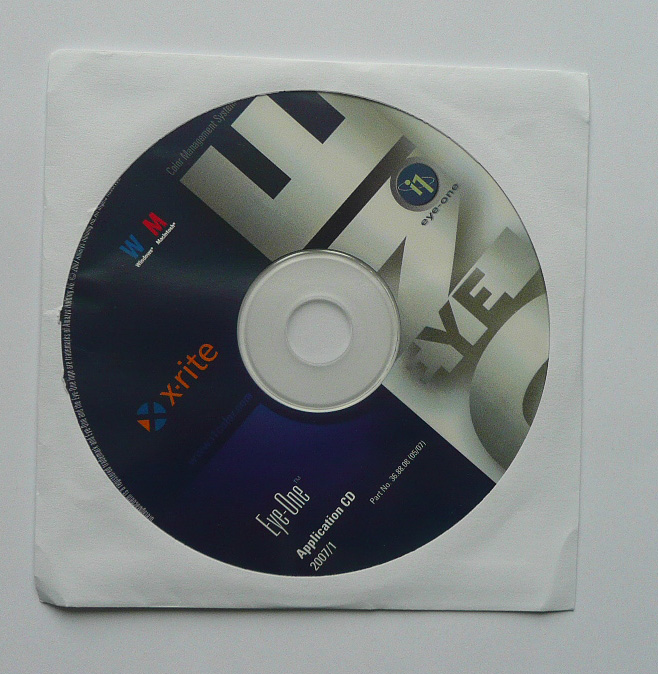
Software CD with i1 Match,
i1 Share and Profile Editor |
 |
|
Beamer holder |
 |
|
Scanner Profiling Chart |
 |
|
Interactive Training Modules
CD |
 |
|
Digital Pantone library |
|
|
$400 upgrade voucher valid
towards any one ProfileMaker solution. |
|
|
i1 Reflective
Scan Target |
|
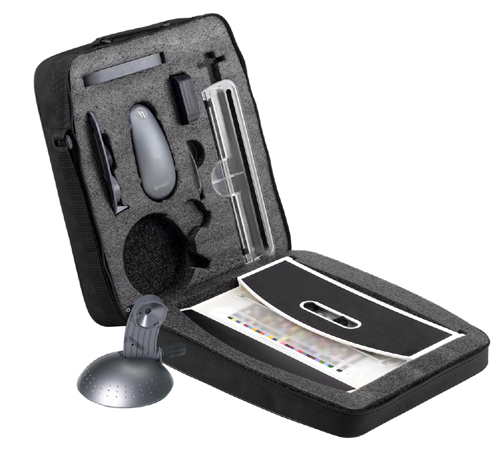
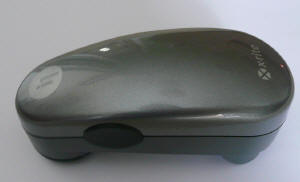
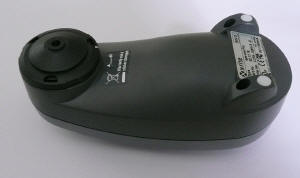
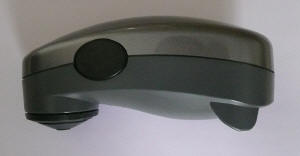
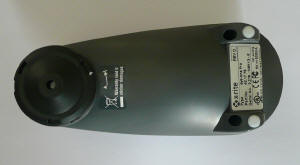
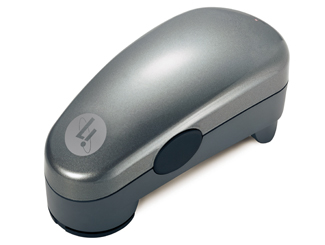
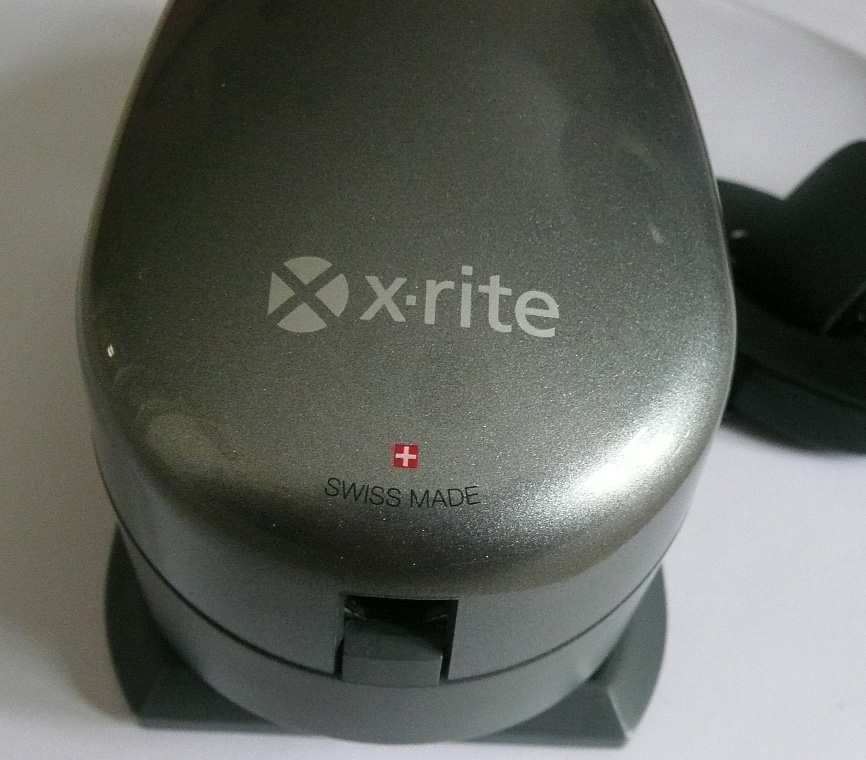
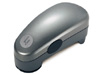
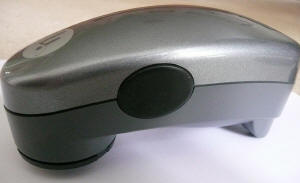
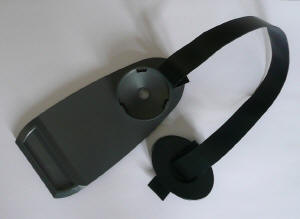
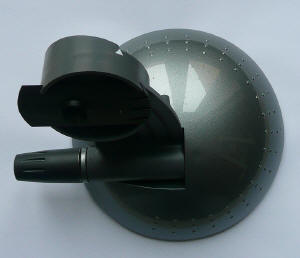
Above: views of the i1 Pro
device. Click for larger versions
The above images show you the
actual i1 Pro spectrophotometer device. The device is pretty big and almost
looks like a stretched i1 Display 2 colorimeter in design. It is about 15cm
long, 6.5cm wide and 5.5cm high on its own. It feels sturdy and well made. You
will notice the actual light sensor on the top right hand picture, in the
circular black section. This is the section which will make measurements from
your display once connected.
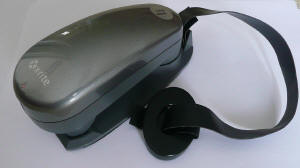
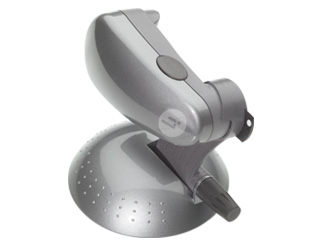
As a comparison, here is the i1
Pro next to the i1 Display 2 colorimeter.
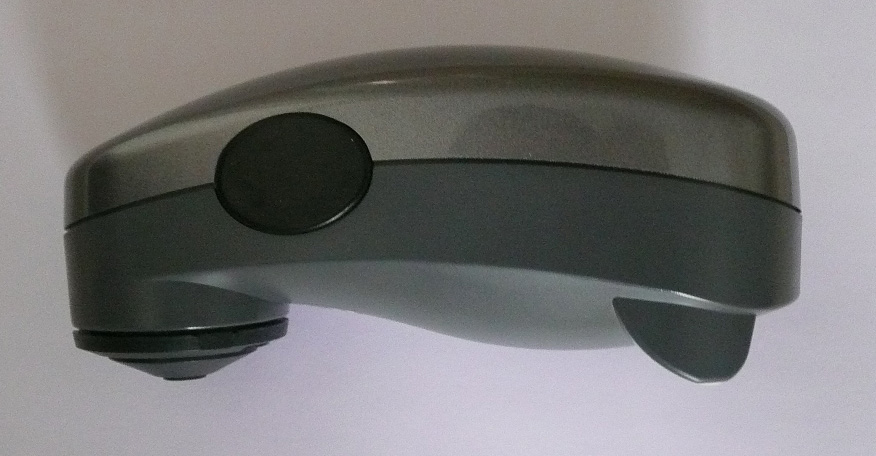
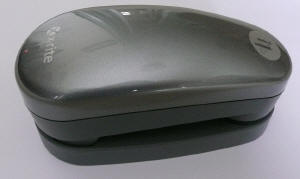
Above: side view of the device.
Click for larger version
On the left hand side of the
device is the function button, used to calibrate the device itself before any
profiling is carried out.
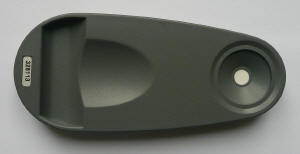
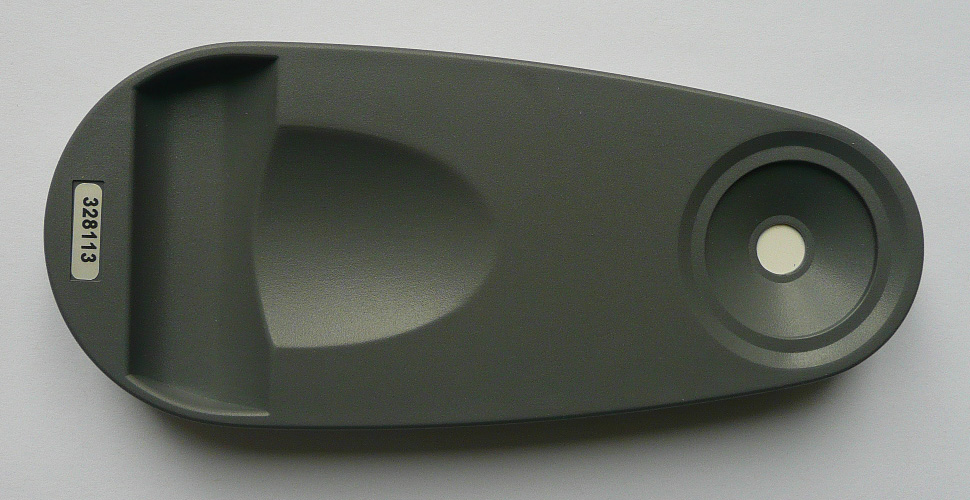
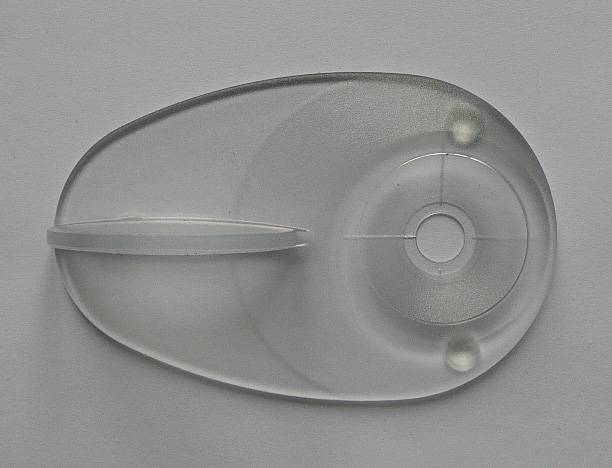
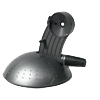
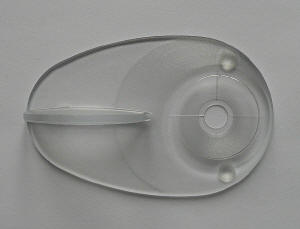
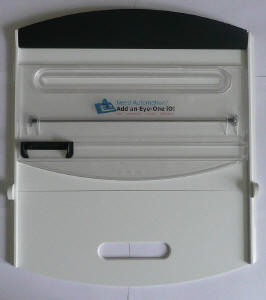
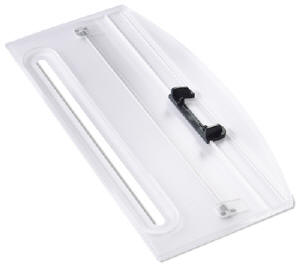
Above: white measurement plate.
Click for larger versions
The above image shows the
calibration plate. This is a small plastic 'dock' which the device sits on. At
the right hand end there is a small white coloured reference circle. This is
used to calibrate the device before it is used to measure the screens light
output. The software will sometimes ask you to place the device on the white
plate, and this is what it means.
Above: Monitor holder attachment.
click for larger versions
The monitor holder attachment
is shown above. It is a plastic bracket with a rubber cable connected at the one
end, and at the other end of this is a pretty heavy counter-weight. The i1 Pro
clips onto this easily and the weight hangs on the other side of your screen to
balance the device. This allows you to position the device easily and steadily
on the screen for measurements. The back of the monitor holder has a foam edge
so that it does not cause damage to your screen while it is resting against it.
The only minor quibble I have is that you have to keep taking the device out of
this holder to place on the reference plate before calibration which can be a
little annoying.

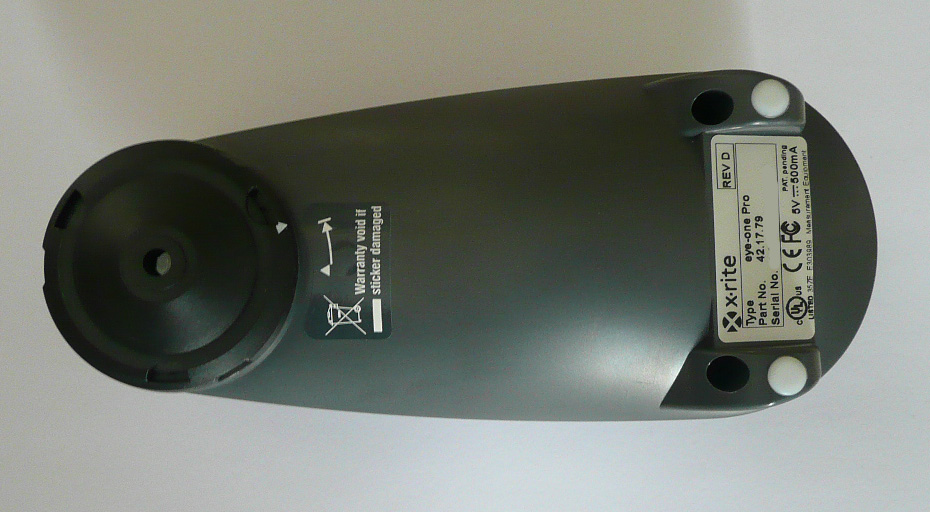
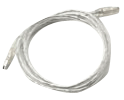
The bottom of the device
features the USB connection. The cable is provided in the box and is of a decent
length.
A 'positioning target' is
provided, but is not used for monitor calibration.

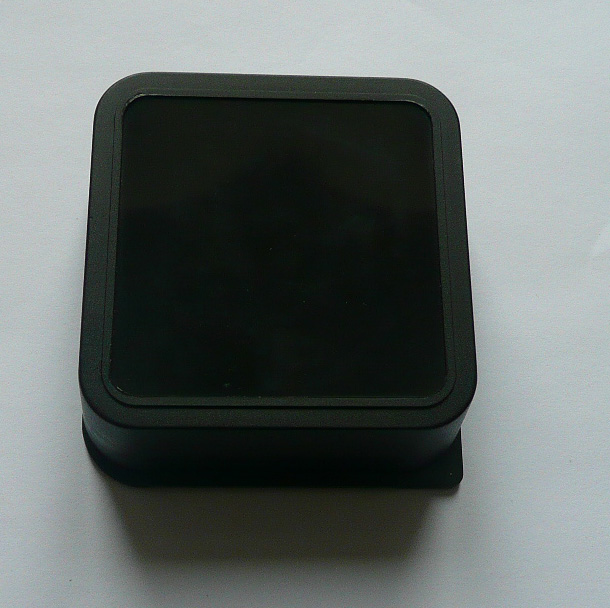
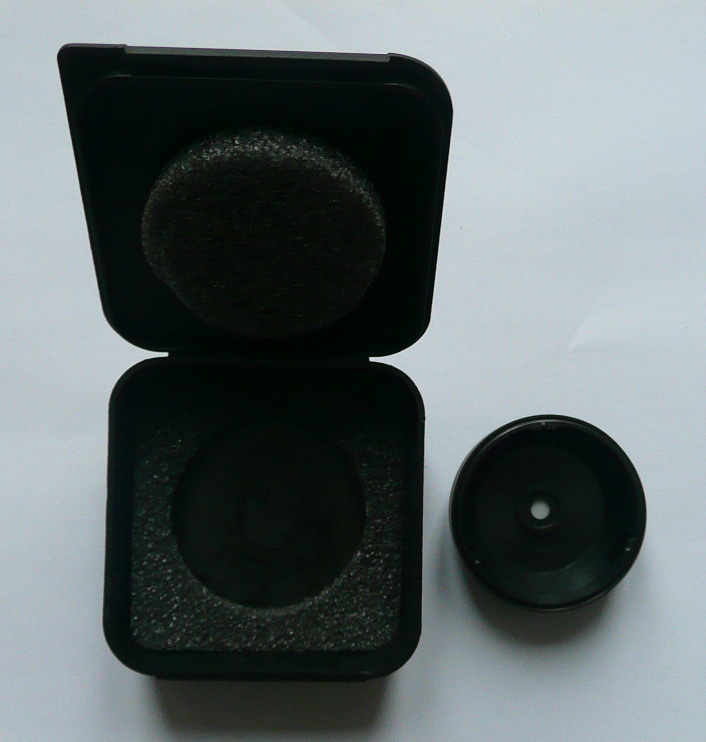
In a small black plastic box
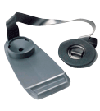
there is an ambient light measuring head as shown above.
Above is the 'iBeamer holder' used
for digital projector profiling. The device is connected as shown above.
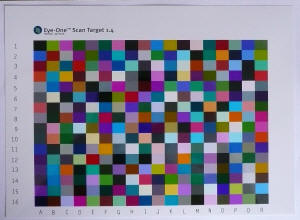
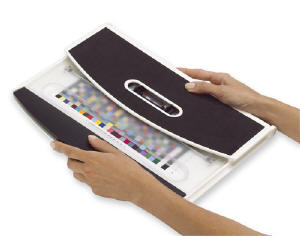
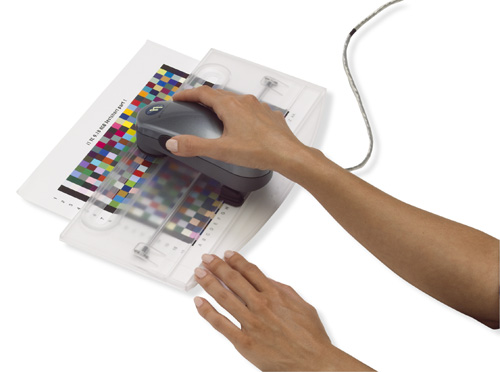
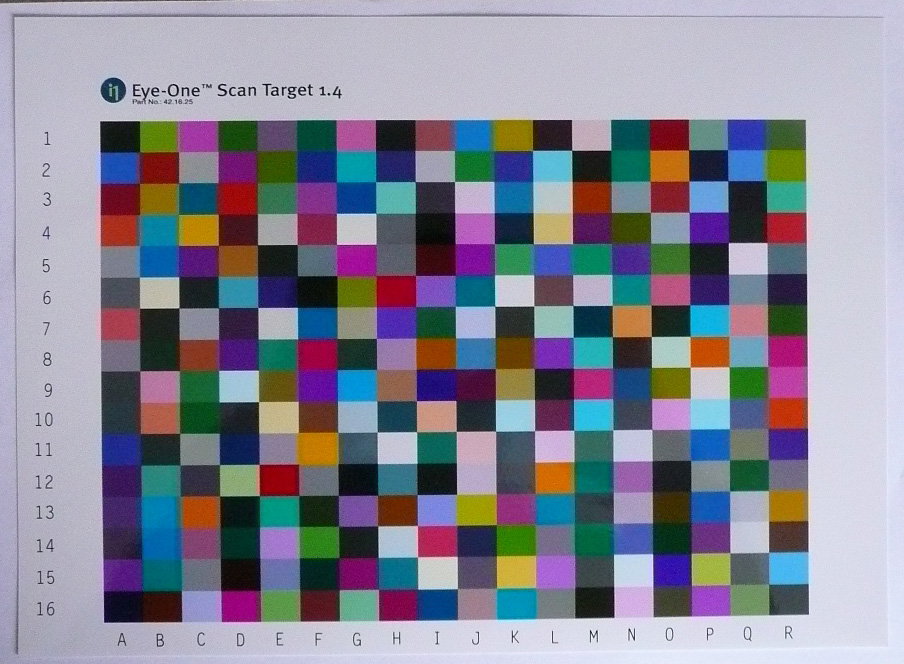
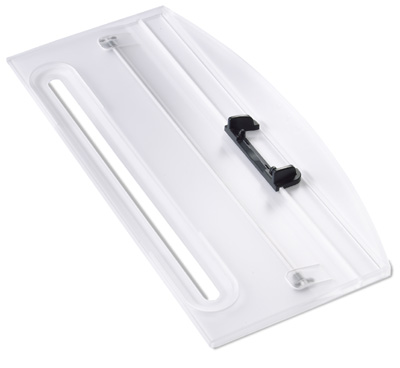
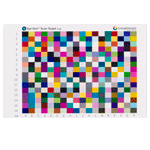
The above images show the
provided ruler / backup board and colour reference board provided. The i1 Pro is
used as shown above as well, but again this is not for monitor calibration.
The various bits of software
are provided on the above CD (left), and an interactive training package is also
supplied (right).
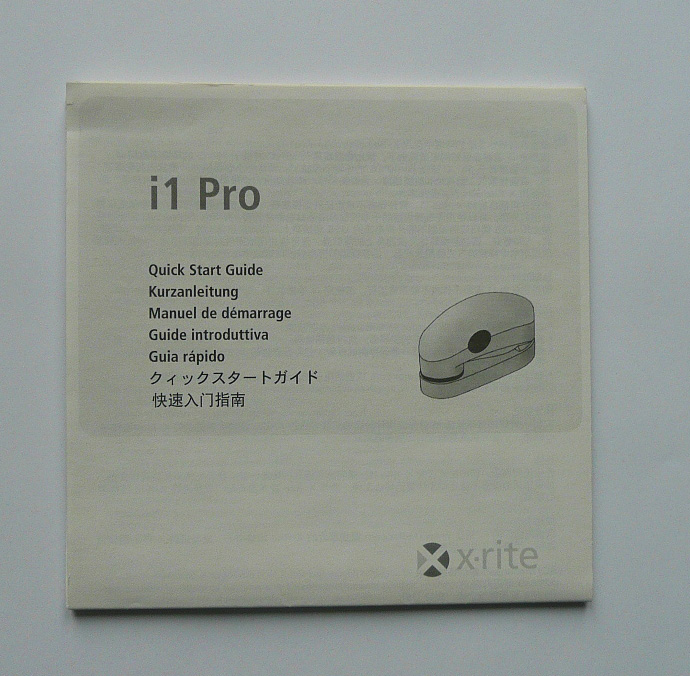
A quick start guide is also
provided with multiple languages.
Other Packages Available
The i1 Pro spectrophotometer device is also compatible
with other packages from X-rite:
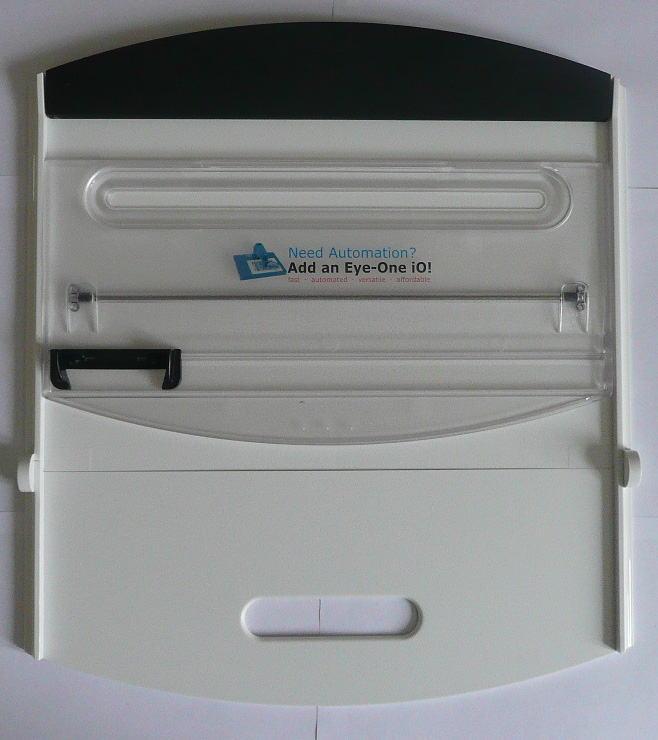
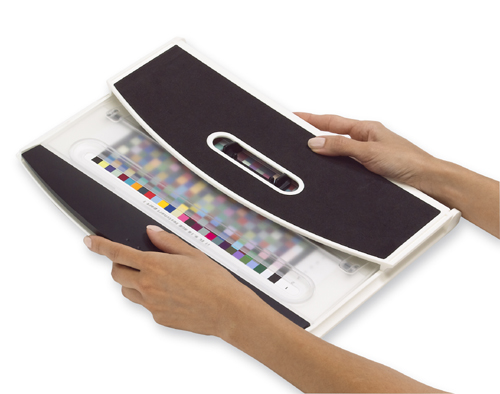
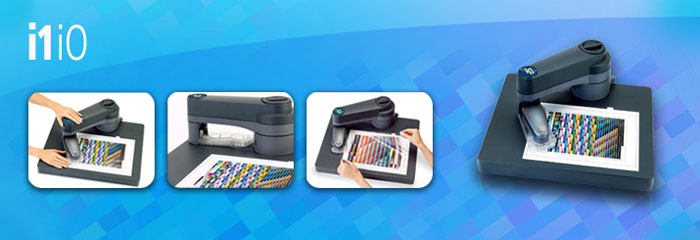
-
i1 iO -
The
i1iO is a robotic, automatic chart reading system that is designed to work
with i1Pro devices. It’s ideal for photographers, designers, and printers who
want to speed up and automate the measurement process. Simply plug in the
device, align the test patch, and the scanning table does all the work—no more
manual strip reading!
Affordably
automate your color workflow and extend the value of your i1Pro color
measuring device. i1iO provides the fastest measurements for reflective test
charts on various substrates up to 10 mm – from thin polybag material to
ceramics and textiles. i1iO reads more than 500 patches per minute, so you’ll
have a custom profile in no time! When combined with any i1Pro
spectrophotometer, i1iO will provide consistent and reliable results, increase
productivity, lower the level of operator skill required, and reduce the risk
of errors. Plus, you’ll still maintain all the great versatile functionality
provided by your i1Pro solution.
You can also get the same i1 Pro hardware in the following package:
-
i1 Basic - The same hardware device which is packaged here with i1
Match software, ambient light measurement head, monitor holder, soft carry
case, spot color positioning target, scanning ruler, backup board, i1
reflective scan target, i1Share software and digital Pantone library. Like the
i1 Extreme package it is available in either NoFilter and UVcut. Purchase
according to your workflow requirements. This i1 Basic package is just a
trimmed down version of the Xtreme package we have with us at the moment.
i1 Match Software - Calibration
We actually had a look at this nice bit of
software when it was paired with X-rite's high end consumer calibration device,
the
i1 Display 2 colorimeter. At the time, the software was up to v 3.6.1 but
the current version is now v 3.6.2 (for Windows, and v3.6.3 for Mac - some
compatibility updates for Mac only). I will be updating the i1 Display 2 review
soon as well since that is a few years old now. As we stated earlier, there will
be a new i1 Pro software package released soon which we will also be testing.
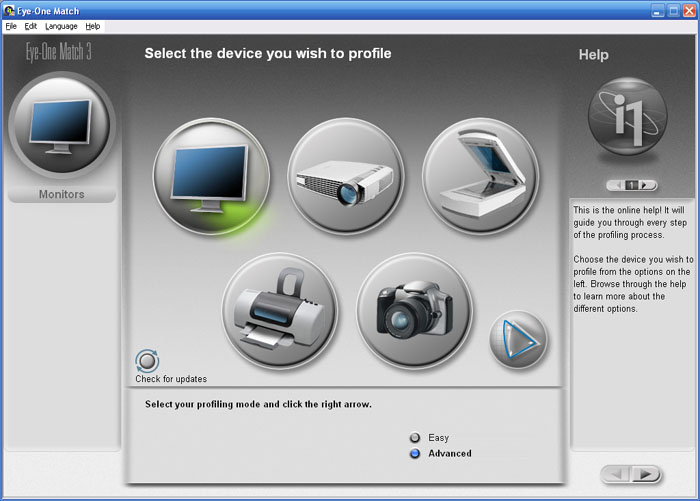
Loading up the software
presents you with the above screen. There are two calibration methods available,
those being 'easy' and 'advanced'. The latter gives you more control and options
of course which is what we will use here. There is functionality within the
software to check for updates of course, and some limited options available via
the top menu bar.
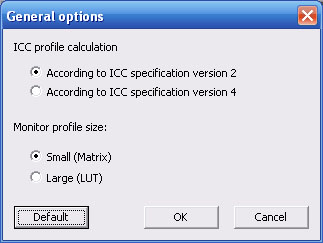
If you enter the options
section you are presented with the above screen (defaults shown). Matrix
profiles are quicker, but a LUT profile can be more accurate and so that is what
we will generate during our calibration process here.
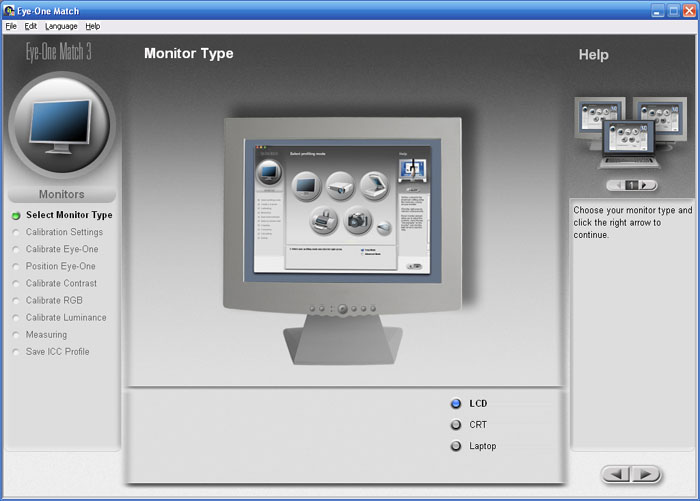
You can chose which type of
display you are using here. We are testing LCD monitors of course. The arrow
buttons on the right hand edge control the process, moving you on to the next
section once you have choosen the relevant options.
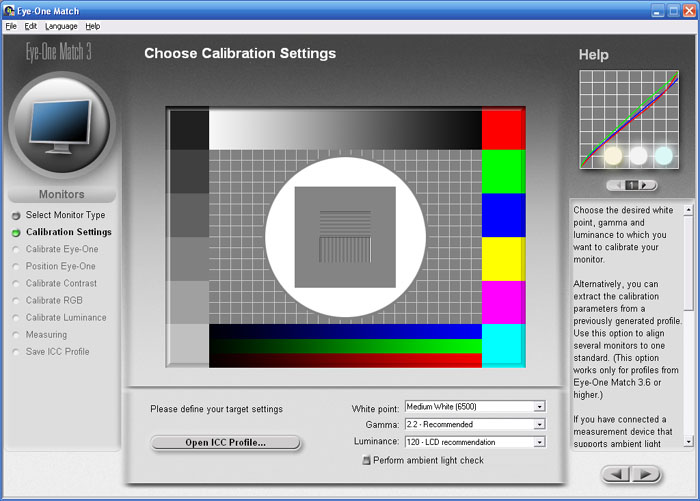
Here you can define your target
settings for the calibration. We have choosen our normal review targets of 6500k
white point / colour temperature, 2.2 gamma and 120 cd/m2 luminance.
There is an option here to use the i1 Pro (or other compatible device) to
perform an ambient light check of your room if you wish. This will tell you the
lighting conditions, light temperature etc of your room if you need to know.
Pressing the 'right' arrow takes you into the next screen.
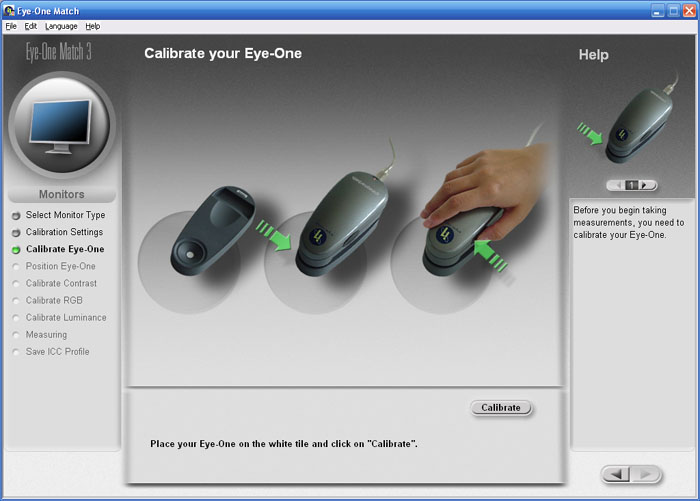
Here you are asked to calibrate
the device first of all. The i1 Pro requires its own calibration against a
reference white point before a monitor calibration or measurement can be taken.
Here you are guided to place the i1 Pro on the provided white tile and press
either the function button on the left hand edge, or the 'calibrate' button
shown on the screen. This only takes a couple of seconds, and afterwards you are
told the device is calibrated and ready to go.
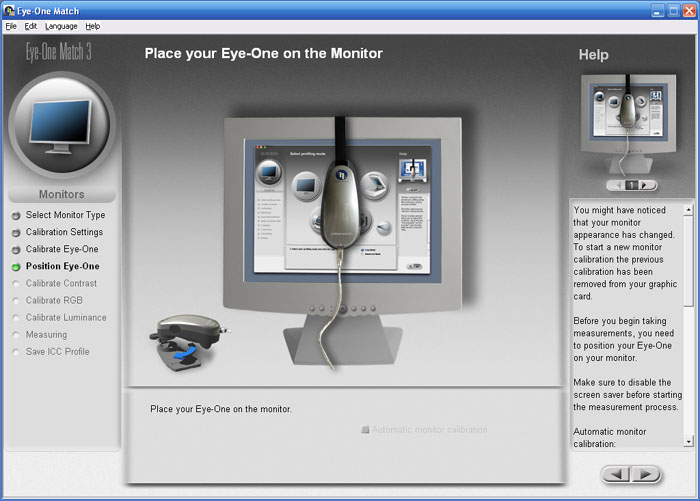
You're now asked to place the
i1 Pro on the screen as shown in the image. You can use the provided monitor
holder to hang the device from the screen ready for measurement and profiling.
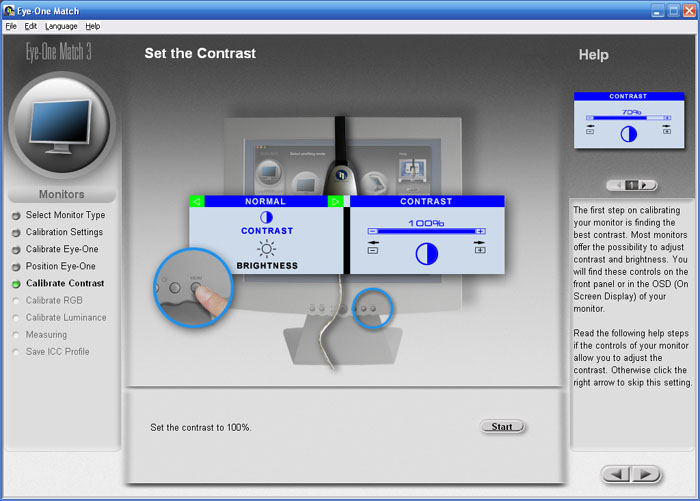
First step is to obtain an
optimum contrast control from the monitor. You are guided through a process to
reach this using the OSD menu adjustments. A green sliding bar helps you
determine the best setting as recommended by the device / software.
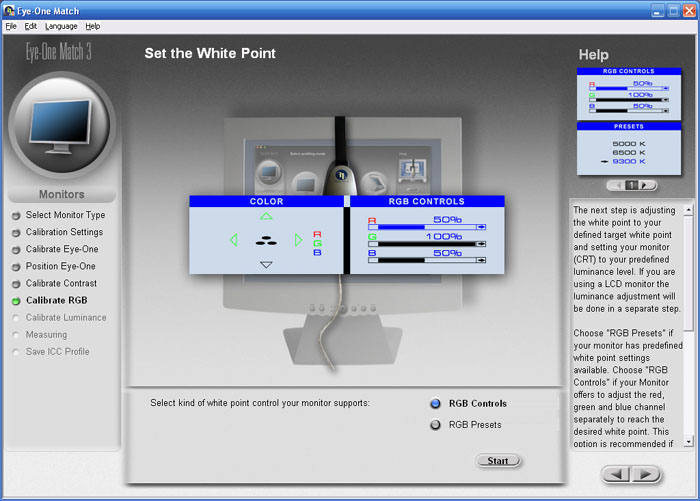
Next you are able to make RGB
adjustments in the OSD menu if you have them available. Again a green sliding
scale helps you get the optimum settings for each colour channel, all the while
telling you your current and target white point. The process is very easy to
follow and doesn't take long to reach the recommended settings.
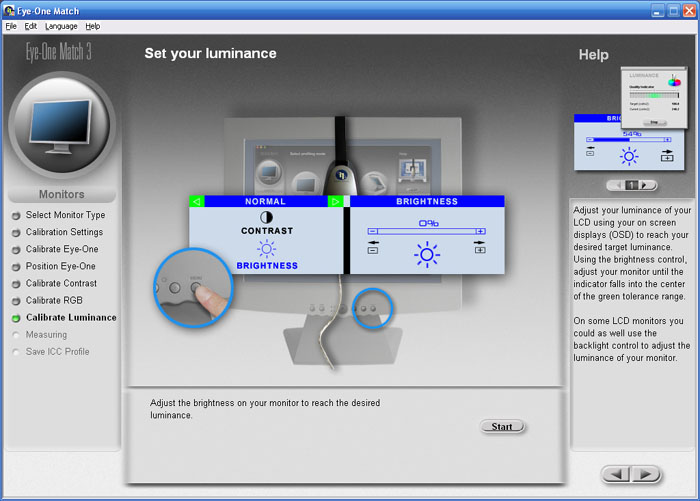
The next step is to reach the
desired luminance, again a slider helps you reach your target easily. Pressing
the forward arrow then enters you into the automated part of the process. You
have made all the adjustments to the hardware (monitor) that you can, and the i1
Pro and i1 Match will now carry out the full monitor profiling. A long series of
different colours and shades is presented in front of the device while it hangs
from the screen, while a progress indicator tells you it is doing its work. The
whole process takes about 3 min 20 sec to complete and an ICC profile is
created.
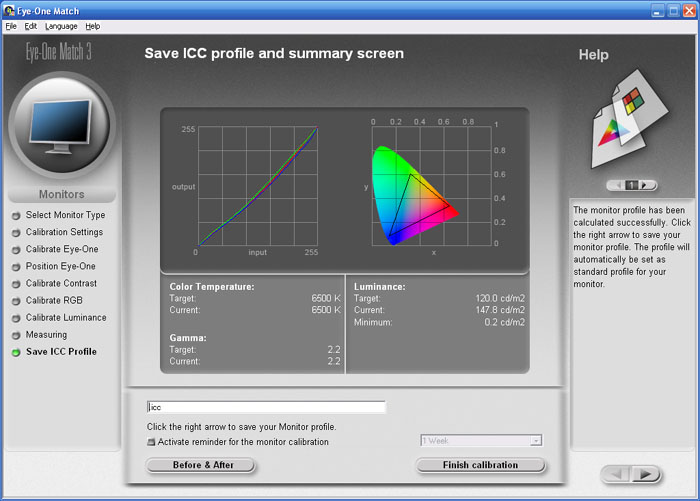
At the end you are presented
with a summary screen as shown above. Gamma curves are shown along with the
readings for white point, luminance and black point. You may
notice that the luminance reading is a little above the target value here. This
is because the brightness control on the monitor was not adjusted during this
particular run-through. The software does not surpess the luminance at a
graphics card level which can sometimes lead to banding and loss of shadow
detail. The monitors brightness control should be used to reach the desired
luminance as this is (normally) a direct control over the backlight intensity.
You are asked to save the ICC
profile you have just created and you can set a reminder to repeat this process
at a given interval if you wish. That's it in terms of the calibration process.
It was all very easy to follow and the on screen guidance is decent and easy to
understand.
i1 Match
Software - Validation
Although it is not massively
advanced or detailed, the i1 Match software does provide a simple validation
function via the 'help' menu (odd place to put it!) You are first presented with
the above screen. Pressing 'start measurement' begins the process. You are asked
again to place the i1 Pro on the white tile for device calibration first. After
this, a smaller window pops up as shown below.
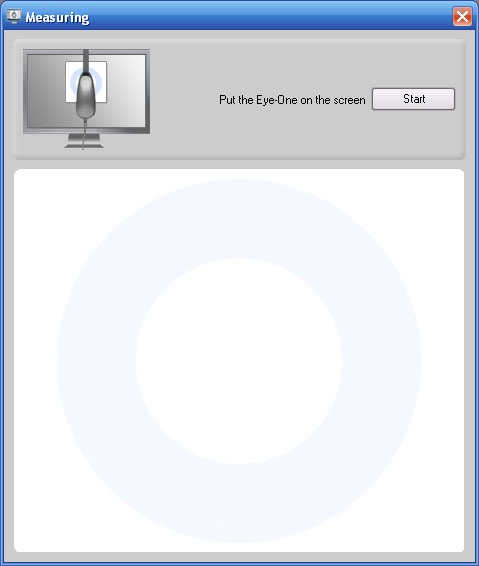
You place the device on the
screen and press 'start' to begin a series of measurements. The block presents a
series of colours and shades to the device for measurement, allowing it to
record the difference between the colour being requested and that being
displayed. This will in turn allow the software to work out the dE - the
difference between the two. This measurement process takes approximately 1 min
15 sec.

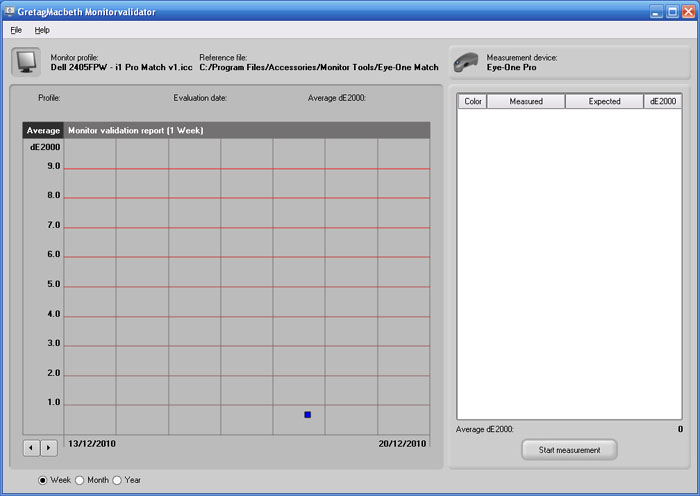
You are then presented with the
above validation report. You can scroll through the different shades measured on
the right hand side, and a dE 2000 figure is listed against each. At the bottom,
the software confirms average dE measured as well. This is a useful way to
ensure your calibration has been successful and maintain an accurate setup over
time. You can use this validate feature at any point with a profile you created
through the i1 Match software (but not a profile from any other software
package) so you can test how far the screen strays over time.
Overall I found the i1 Match
software easy to use, intuitive and effective in creating a monitor profile and
calibration. The software is a reasonable option for the standard user but does
perhaps lack some of the features, options and reports of other packages such as
LaCie's Blue Eye Pro, BasICColor or ColorEyes. For the purposes of monitor
reviewing we tend to us the LaCie package since it's 'test and report' feature
is very useful, easy to follow and produces some pleasing graphical reports. It
is also very good for measuring a "before" view of the screen, able to examine
the gamma, colour temperature, luminance, gamut and colour accuracy of the
screen no matter how it is set up (or not set up at all in fact). the i1 Match
software's validation function is far less detailed and can only be used to
validate any given created profile. It cannot be used to test a screen
out-of-the-box for instance without a profile active as we like to do for our
reviews.
i1 Pro With Other
Software


Being a very versatile
spectrophotometer, the
i1 Pro can be combined with many other software packages in the market. We will
briefly test these as well, although will not be going into the levels of detail
we have with the X-rite bundled i1 Match software.
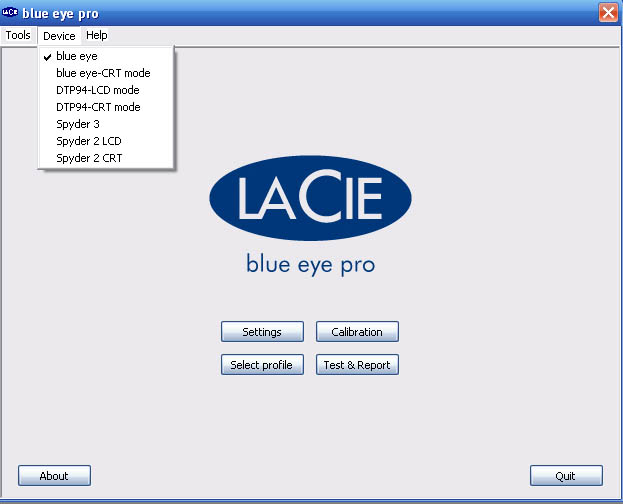
LaCie Blue Eye Pro
Although it's not listed specifically in the
'devices' menu, the i1 Pro is compatible with the Blue Eye software. If you
leave the device selected as 'Blue Eye' then it works fine. Before any
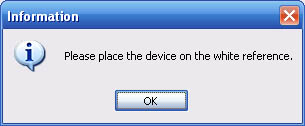
calibration it asks you to place the device on the white reference tile to
calibrate the device. After this, the software works as it would with the i1
Display 2 device we usually use in our reviews.
As I've mentioned already, the LaCie software has
a very useful test and report function. This can be used to examine the set up
of any screen at whatever point, and in whatever setting. This is useful when
reviewing monitors as it allows us to test the screens factory setup, before any
calibration or profiling is carried out. We hooked up the i1 Pro device again
and loaded up LaCie's software (v 4.5.5 is the latest). I restored the monitor
to factory settings and disabled any active graphics card adjustments / ICC
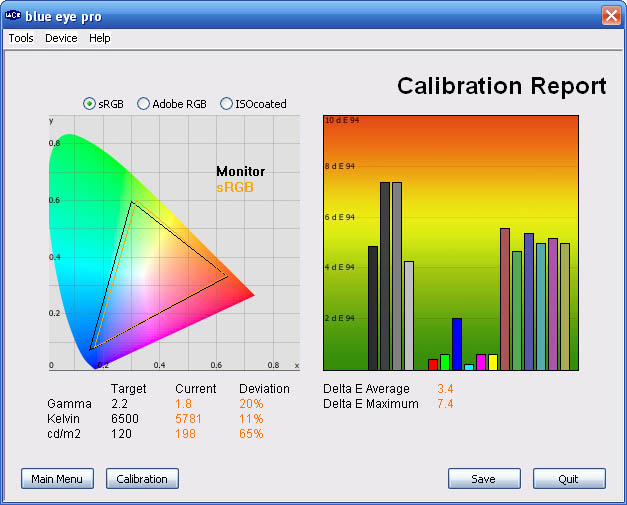
profiles. I first of all tested the screen we were using (Dell's 24" 2405FPW
S-PVA monitor) to establish the 'before' picture. This test and report takes
approximately 20 seconds to complete.
Targets for these tests are as follows:
-
CIE Diagram - validates the colour space
covered by the monitors backlighting with the black triangle representing the
display
-
Gamma - we aim for 2.2 which is the default
for computer monitors
-
Colour temperature / white point - we aim
for 6500k which is the temperature of daylight
-
Luminance - we aim for 120
cd/m2, which is
the recommended luminance for LCD monitors in normal lighting conditions
-
Black depth - we aim
for as low as possible to maximise shadow detail and to offer us the best
contrast ratio
-
Contrast ratio - we aim
for as high as possible. Any dynamic contrast ratio controls are turned off here
if present
-
dE average / maximum -
as low as possible.
If DeltaE >3, the color displayed is significantly different from the
theoretical one, meaning that the difference will be perceptible to the
viewer.
If DeltaE <2, LaCie considers the calibration a success; there remains a
slight difference, but it is barely undetectable.
If DeltaE < 1, the color fidelity is excellent.
|
Monitor OSD Option |
Default Settings |
|
Brightness |
50 |
|
Contrast |
50 |
|
Color Settings |
Normal preset (sRGB) |
Dell 2405FPW - Default Factory Settings
|
|
Default Settings |
|
luminance (cd/m2) |
198 |
|
Black Point (cd/m2) |
0.27 |
|
Contrast Ratio |
733:1 |
As you can see, the default settings of the
screen were considerably off from the desired targets. There was significant
deviance in gamma set up (1.8), and luminance was very high at 198 cd/m2. Colour
accuracy was not very good either with dE average of 3.4 and maximum of 7.4.
This is a typical default factory setting of many monitors and so proper
calibration would be needed to correct this and improve the picture quality.
Thankfully we have a high end spectrophotometer here to do just that.
I then entered the calibration
mode. Like X-rite's i1 Match software you are guided through adjustments of the
OSD menu for brightness, contrast and RGB levels. After this, the software
carries out a fully automated process making adjustments at the graphics card
LUT level and creating an ICC profile. This whole process takes approximately 3
min 35 sec to complete during which a series of colours are flashed in front of
the device. After this is completed you are prompted to save your profile. I
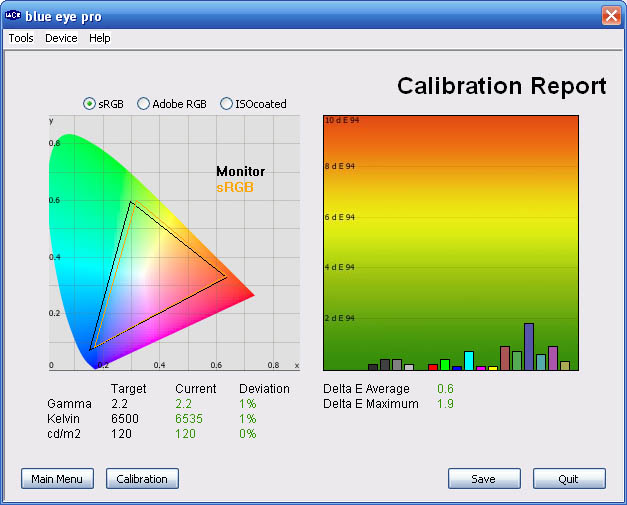
then carried out another test and report to capture the 'after' results.
|
Monitor OSD Option |
Altered Settings |
|
Brightness |
0 |
|
Contrast |
50 |
|
Color Settings (RGB) |
32, 35, 41 |
Dell 2405FPW - Calibrated Settings
|
|
Calibrated Settings |
|
luminance (cd/m2) |
120 |
|
Black Point (cd/m2) |
0.16 |
|
Contrast Ratio |
730:1 |
As you can see, the software
did a great job of profiling the monitor and correcting the settings in line
with our targets. Gamma, colour temperature and luminance were now all pretty
much spot on. dE average was down to a much lower 0.6, maximum of 1.9. Again the
i1 Pro device is perfectly useable with this software if you wish, producing
some excellent results and an easy to follow process. We have used this
combination in our recent
BenQ XL2410T review as well in fact.
BasICColor Display
BasICColor is a rather nice piece of software
which has a lot of options and features and is well regarded in the market. A
free 14-day trial license for a fully functional version is even available
from their website. This is very similar
to the
NEC SpectraView Profiler software we tested with the NEC PA271W monitor, as
they manufacturer the software for NEC in Europe. The current BasICColor
software is at version 4.1.22 and we will test it briefly here with the i1 Pro
device.
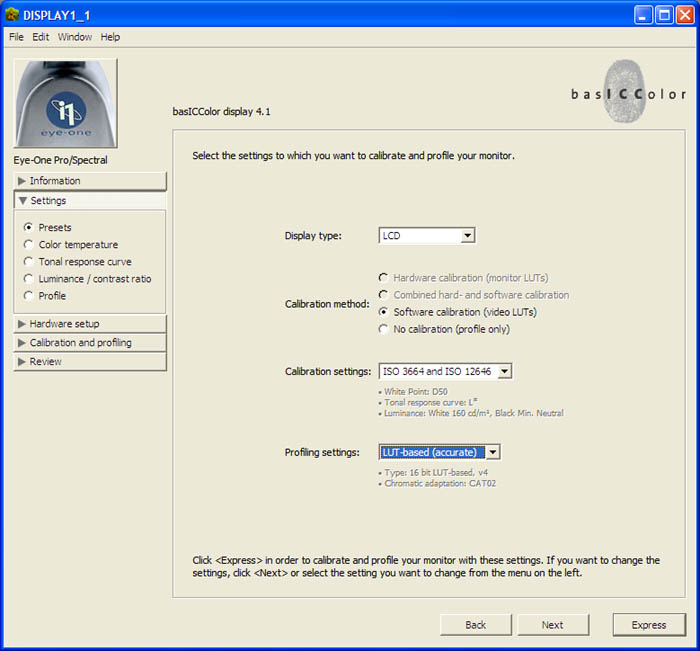
A settings screen allows you to configure your
calibration targets. You will also notice the 'calibration method' section
allows you to choose between hardware and software calibration, depending on
whether your monitor supports hardware level LUT adjustments or not. We set all
our usual target settings in these sections in the first instance.

You can select the i1 Pro as a compatible device
with this software. You are asked to calibrate the device by placing it on a
'dark opaque surface' as opposed to using the white tile. Once you've done this
you can progress into the calibration process. The actual calibration process
switches between many different colours and shades and is all automated. It
takes around 2 min 45 sec to complete.
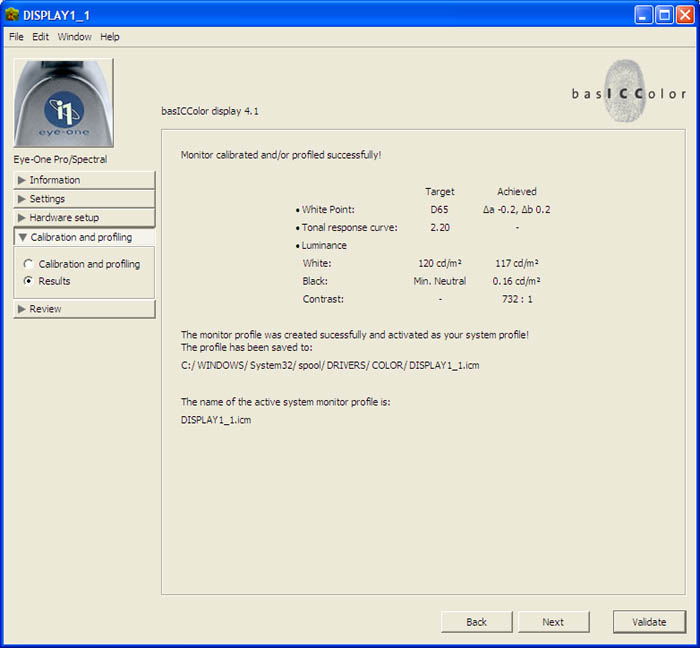
After calibration and profiling has been done you
are presented with a summary results screen. You can validate the profile even
further by pressing the 'validate' button shown. The validation takes about 32
seconds to complete using the i1 Pro.
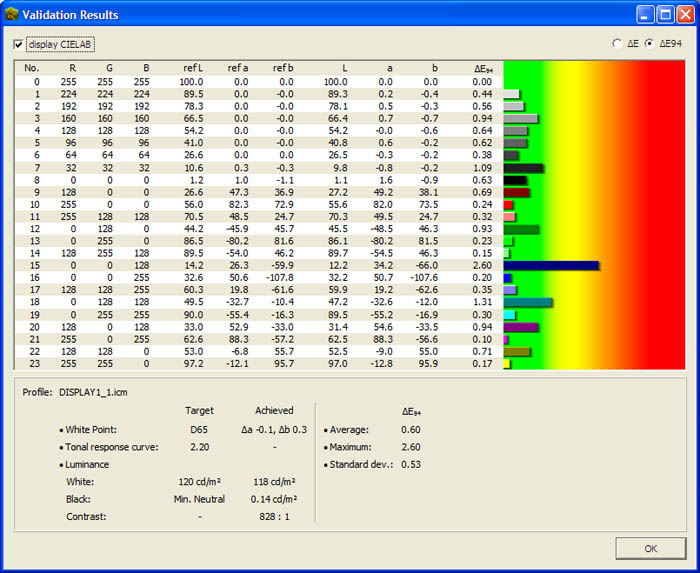
The validation in BasICColor's software is pretty
thorough and useful, and quite similar to that prestented by LaCie's Blue Eye
Pro software. Confirmation about luminance, black point, contrast ratio, and
colour accuracy is given. Again these reports are very useful. Like LaCie's
software you are able to validate the monitor set up at any point, not just
after a valid calibration. This is again useful if you want to run a before and
after view of your screen.
ColorEyes Display Pro
We took a more detailed look at
ColorEye's
professional software in
March 2010. This is a thorough and highly regarded piece of software
offering a very good range of options and some very good accuracy to the
profiling and calibration process. We tested the software with the i1 Pro as
well here and will give a quick summary. The latest version of the software is
v1.52 r036

Within the settings you can
specify your calibration device, and we selected the i1 Pro here. You can again
set all your targets for calibration in the normal way and this is
straightforward and easy to use. Once you have done this you are prompted to
begin the calibration process. With 76 steps of measurement (for highest
accuracy) this takes quite a
long time to complete and lasts about 5 mins 10 seconds.
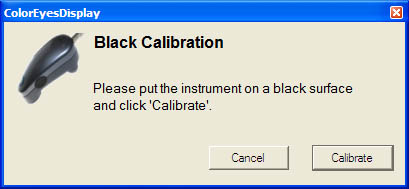
You are asked to calibrate the
device as shown above by placing it on a black surface, again instead of the
provided white plate method used in the i1 Match software.
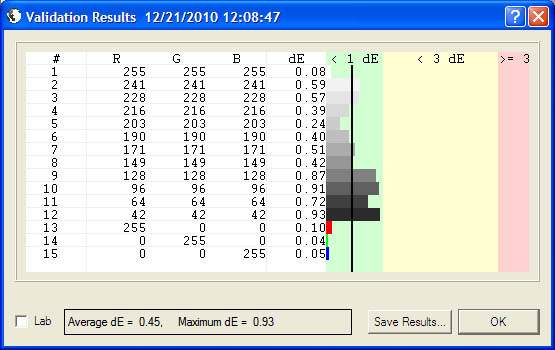
After the calibration has
completed the software automatically enters into the validation process
(assuming you didn't disable it). This validation takes around 45 seconds to
complete and confirms your colour accuracy after calibration. A dE average and
maximum is provided along with a simple bar graph of deviances. Again this is a
useful feature for validating the performance of the screen and active profile.
Conclusion
The i1
Pro hardware itself is widely regarded as a high end spectrophotometer and is
one of the best you can buy without spending several thousands of pounds or
getting true 'reference grade' equipment. Being a spectrophotometer it offers
the most accurate readings for the widest range of displays and is more suited
than a colorimeter due to the way it reads light and makes measurements. The i1
Pro does have a drawback in its relatively limited low-light sensitivity. It
simply does not read as low (close to black) as most colorimeters. The i1 Pro
alone is therefore not the perfect choice for gamma and contrast measurements
that will generally require readings below the i1 Pro's effective operating
range, but it can easily be paired with a decent colorimeter to provide these
measurements. In addition to its superb accuracy it is the most versatile meter
available due to the technology used. It is able to read just about any kind of
display accurately including CRT, plasma, LCD, standard gamut, wide gamut and
LED backlit displays. Spectrophotometer technology is typically slow however: It
can take longer for each read to come back and update the software that you
happen to be using, especially at the dark end of the grey scale.
I felt the i1 Extreme Package was very professionally presented and came with
many different parts and extras for use with photos, printers, projectors etc.
We have tested the device with monitors here of course and we found the results
very pleasing. The i1 Match software is simple and easy to use and produces some
excellent results. Although it doesn't have the greatest reporting feature, it
at least gives you some validation process. The i1 Pro itself can be easily
paired with other well regarded and popular software packages as well so there
is a lot of flexibility. We are looking forward to testing X-rite's new software
solutions when they are available too.
The i1 Extreme package retails for around £1,100 GBP so it's not cheap of
course. The new i1 Pro packages have yet to be defined so there might be a more
cost effective way of getting the device if you don't need all the additional
extras or only need it for a couple of uses. A high end colorimeter like the i1
Display 2 for example retails for ~£140 and is probably suitable for most
regular monitor users. Those who need high end performance and calibration, want
professional grade results, or need to carry out colour management between
various devices and technologies could well benefit from a high quality
spectrophotometer like the i1 Pro.
|
Pros |
Cons |
|
High end spectrophotometer
device which is very well regarded |
More limited at the low
luminance end than many colorimeters |
|
Excellent package and extras
in i1 Extreme Package |
High price premium for a
spectrophotometer device |
|
i1 Match software is decent
and i1 Pro can also be combined with many other software suites |
Limited reporting features
from current i1 Match software |
Discuss this
review in our forum. For further information please visit
www.xritephoto.com or tel X-rite: +44
(0)1625 871100