Asus ROG Swift 360Hz PG259QN

Introduction
Monitor refresh rates have been increasing significantly over the last few years and consumers are always looking for the latest and greatest specs. Refresh rate on LCD monitors isn’t just a spec though, this has a direct and noticeable impact on the motion clarity you experience when using the screen for gaming and fast paced multimedia. It relates to how the human eye tracks movement on LCD ‘sample and hold’ type displays, and basically the higher the refresh rate, the better the clarity in theory. You can read our article about this here if you want to understand more.
Over the years we’ve seen big improvements in motion clarity, blurring and gaming performance from LCD monitors with the update from old standard 60Hz screens to higher refresh rates like 120Hz and then later 144Hz. These have become the norm now for gaming monitors and really the entry point if you are looking to buy a decent gaming screen. There are obvious significant improvements in gaming experience as you move up from 60Hz to 120/144Hz for sure. Later on came various 240Hz monitors, offering smaller but still reasonable improvements in motion clarity along with support for higher frame rates. 240Hz has been around for over 3.5 years now since we reviewed the first model, the AOC AGON AG251FZ back in January 2017 and there’s a wide range of displays nowadays with this extra high refresh rate.
It’s not just about driving the supported input refresh rate though, as to make these super-high refreshes viable the panel response times need to be able to keep up sufficiently. That’s been part of the challenge in pushing refresh rates higher. TN Film has been a long-standing fast gaming technology but we’ve also seen major improvements in IPS response times in the last couple of years, and much more recently finally seen some breakthroughs with VA technology like that used in the new 240Hz Samsung Odyssey G7 27″ and 32″ models that we’ve reviewed.
So what next? The answer is the new range of 360Hz compatible monitors that are starting to emerge, like the brand new Asus ROG Swift 360Hz PG259QN that we have with us now for review. These first emerged at CES 2020 in January when Asus and NVIDIA showcased early prototypes of this display. We have also seen similar models announced from Acer (their Predator X25) and Dell (their Alienware AW2521H), but Asus are first to market with their model. The PG259QN is part of Asus’ popular ROG Swift branded range of monitors and is 24.5″ in size, with a 1920 x 1080 resolution IPS-type panel. This is supported by a Native G-sync hardware module from NVIDIA to allow variable refresh rate support for smooth gaming, and to help cope with the system demands of 1080p at up to 360Hz. There are a range of added gaming features and options, including NVIDIA’s Ultra Low Motion Blur (ULMB) backlight option. Note also that despite this being a hardware G-sync module screen we confirmed you CAN use this from AMD FreeSync systems as well over DisplayPort, so the screen is not limited to just NVIDIA users.
This screens marks the first venture in to refresh rates beyond 240Hz and we are excited to see what it can offer. It’s designed for professional esports gamers and according to Asus’ marketing material “is ideal for fast-paced esports titles like Counter-Strike: Global Offensive, Rainbow Six: Siege, Overwatch, and Fortnite. In a world where milliseconds count, the blazing-fast 360 Hz refresh rate is the difference between victory and defeat. In the world of competitive sports, a 4% difference is a game changer. To put this into context, in the 2016 Summer Olympics, 1% determined the difference between silver and gold in both men’s and women’s 100m and 200m dashes.”

If you enjoy our work and want to say thanks, donations to the site are very welcome. If you would like to get early access to future reviews please consider becoming a TFT Central supporter.

| Check Availability and Pricing – Affiliate Links |
|---|
| Amazon | Overclockers UK |
| TFTCentral is a participant in the Amazon Services LLC Associates Programme, an affiliate advertising programme designed to provide a means for sites to earn advertising fees by advertising and linking to Amazon.com, Amazon.co.uk, Amazon.de, Amazon.ca and other Amazon stores worldwide. We also participate in a similar scheme for Overclockers.co.uk. |
Specifications and Features
The following table gives detailed information about the specs of the screen as advertised:

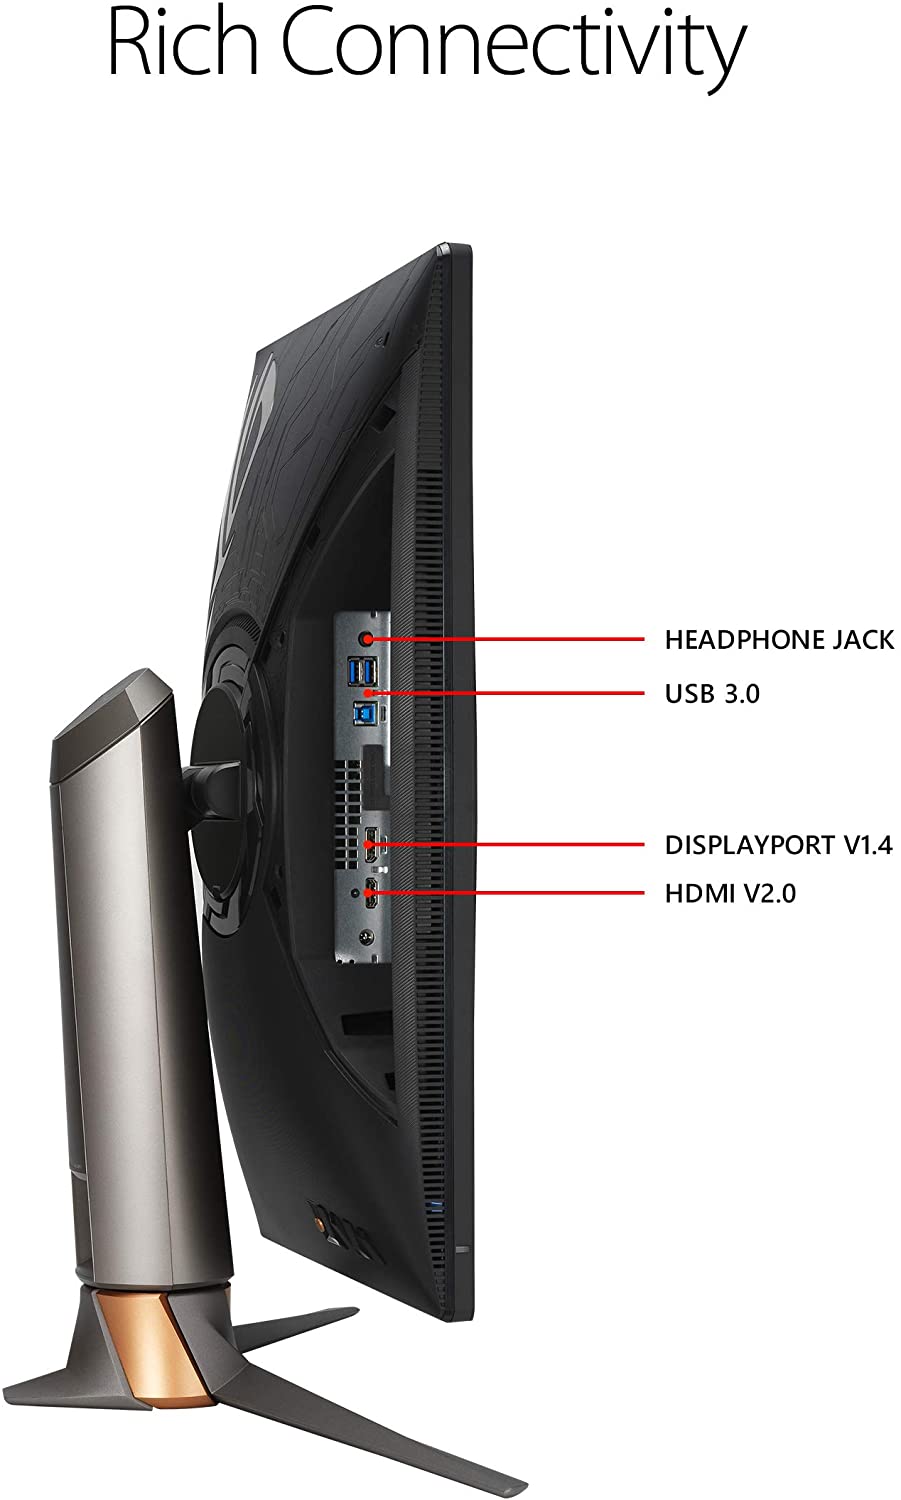
The PG259QN offers a modest range of modern connectivity with 1x DisplayPort 1.4 and 1 x HDMI 2.0 offered for video connections. This is limited by the use of the Native G-sync hardware module, but it’s good to see the latest v2 module used here offering DP 1.4 / HDMI 2.0 as opposed to the older module which could only support DP 1.2 / HDMI 1.4. These are needed to help support the maximum refresh rates as well. These connections are located on the back of the screen along with a headphone output. There are also 2x USB 3.0 ports located there. For PC connectivity the DisplayPort is the most common option, with HDMI being available then for connecting external games consoles or Blu-ray players potentially. The screen has an external power supply and the screen also comes packaged with the power cable and brick that you need.
Below is a summary of the features and connections of the screen.
| Feature | Yes / No | Feature | Yes / No |
| Tilt adjust | DVI | ||
| Height adjust | HDMI | ||
| Swivel adjust | USB type-C | ||
| Rotate adjust | DisplayPort | ||
| VESA compliant | Component | ||
| USB 2.0 Ports | Audio connection | ||
| USB 3.0 Ports | HDCP Support | ||
| Card Reader | Integrated Speakers | ||
| Ambient Light Sensor | PiP / PbP | ||
| Human Motion Sensor | Blur Reduction Mode | ||
| Touch Screen | NVIDIA G-Sync (native) | ||
| Factory calibration | AMD FreeSync | ||
| Hardware calibration | G-sync Compatible Certified | n/a | |
| Uniformity correction | Meaningful HDR |
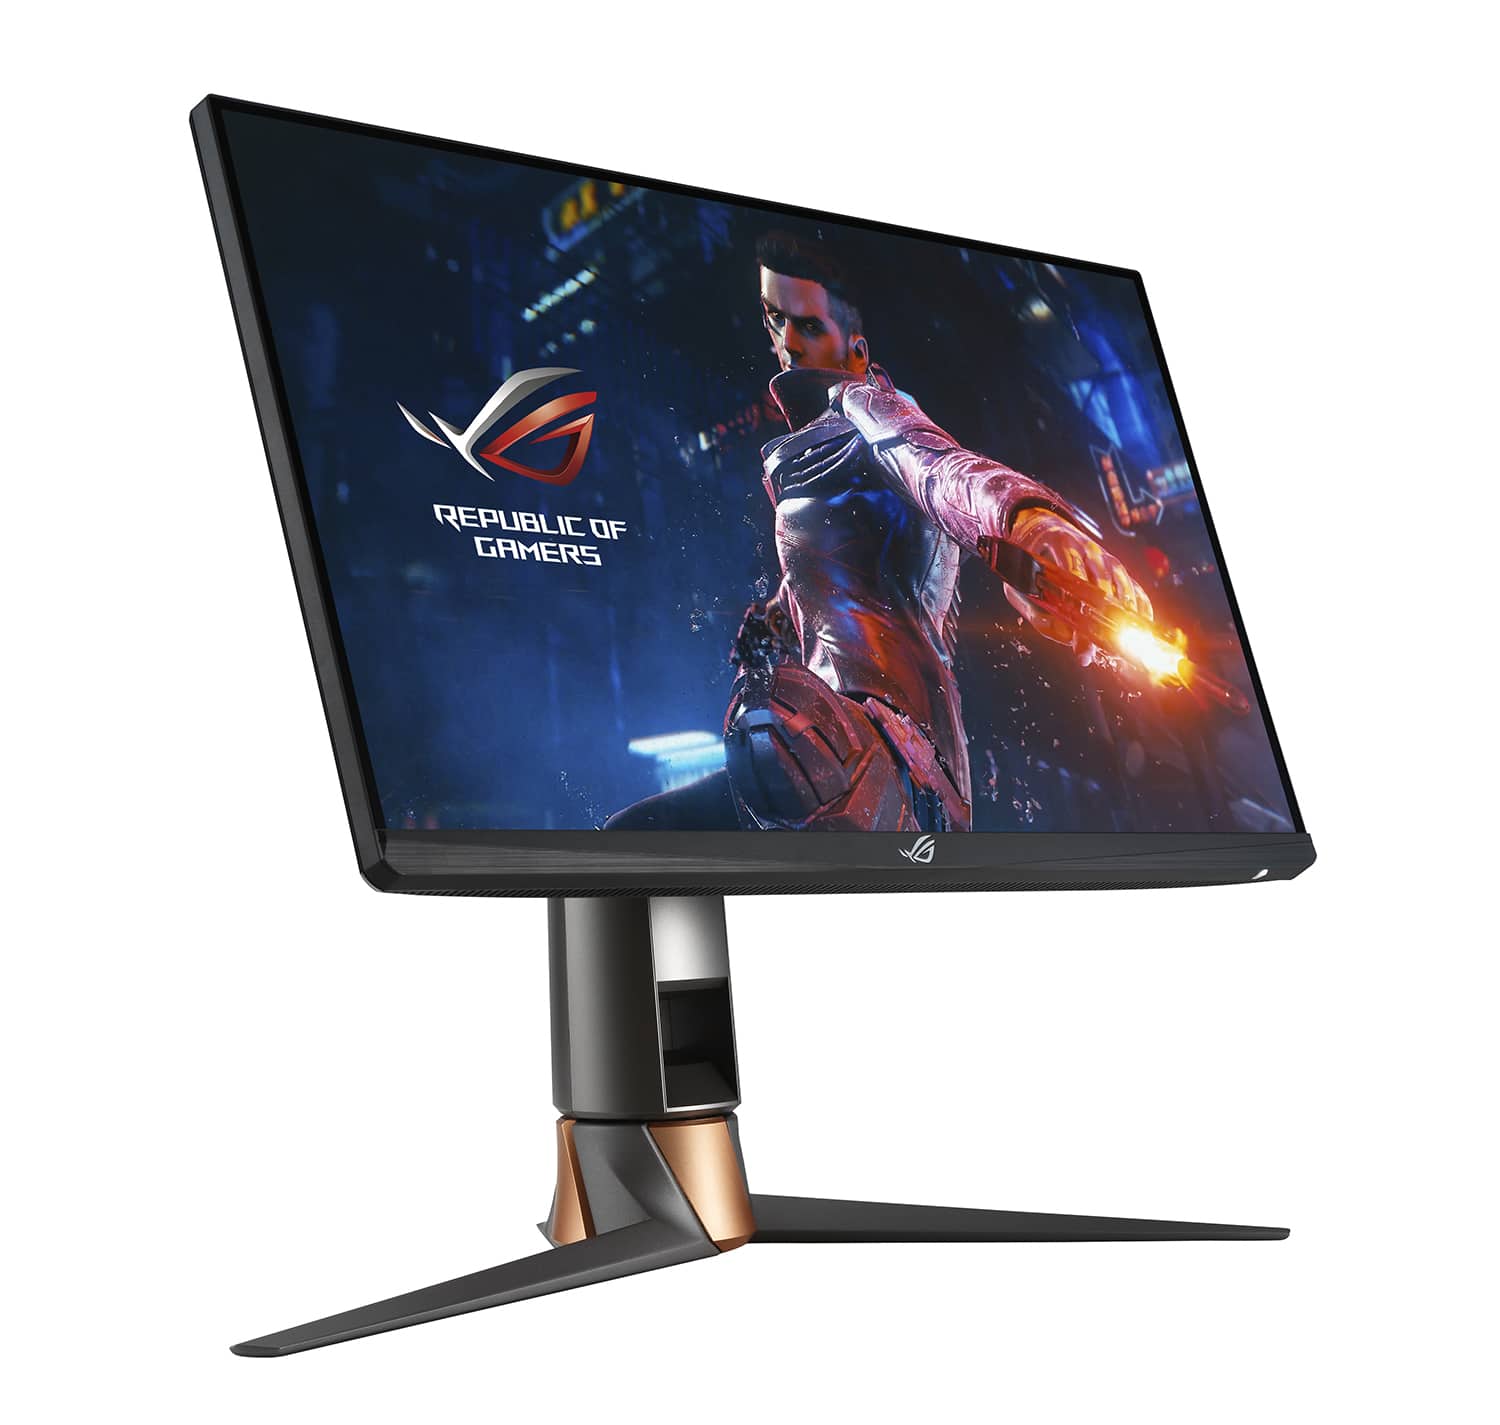
Design and Ergonomics
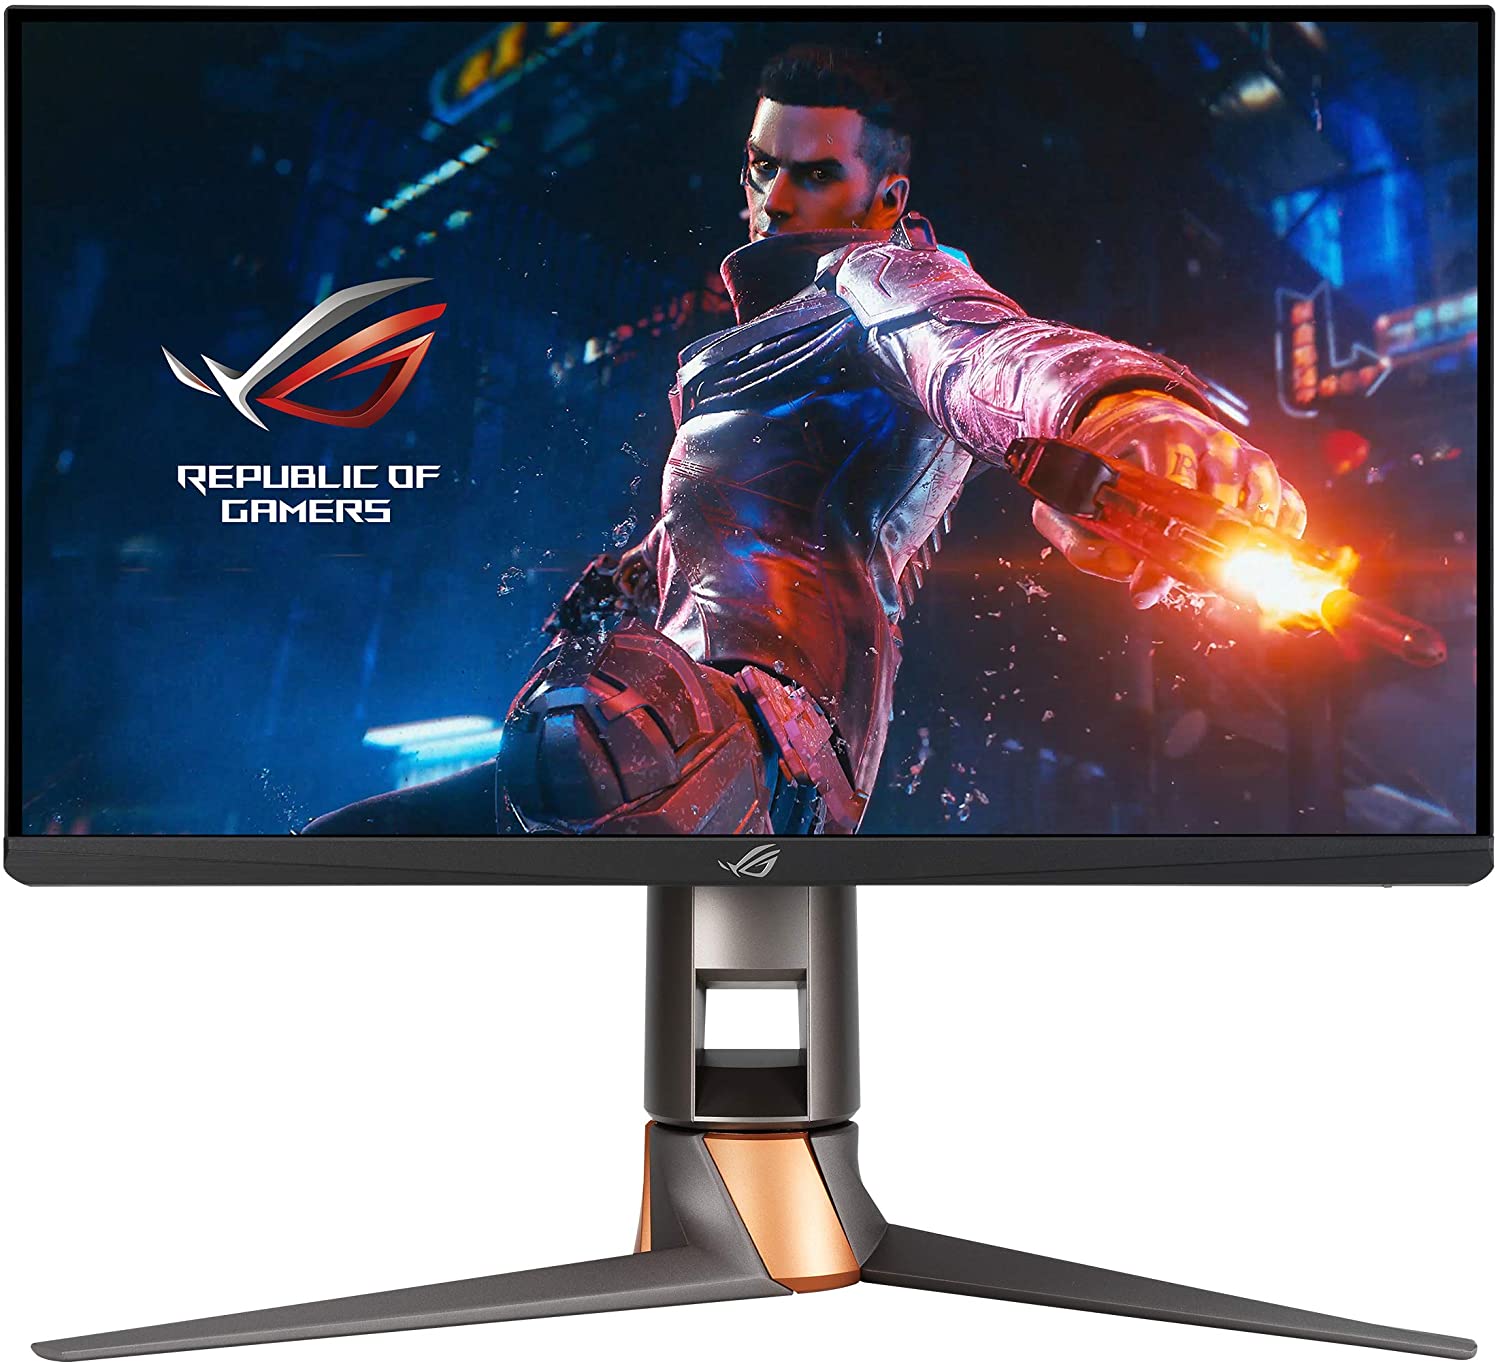
The PG259QN carries a familiar ROG Swift style that we are accustomed to from other displays we’ve tested in this range before. There is a 3-side borderless design with a thin 1.5mm black plastic edge around the sides and top, then a further 4.5mm black panel border before the image starts. Along the bottom edge is a more traditional 17mm thick matte black plastic bezel and a small 1.5mm black panel border. There is a shiny silver ROG Swift logo in the middle of the bottom bezel but no other markings or labels. Asus talk on their website about how the screen features “a special non-reflective coating on the bottom bezel helps reduce onscreen reflections.” The power LED has also been positioned carefully, their website says where “the indicator light has been moved to the underside of the bezel, so there are no distractions in your line of sight.“
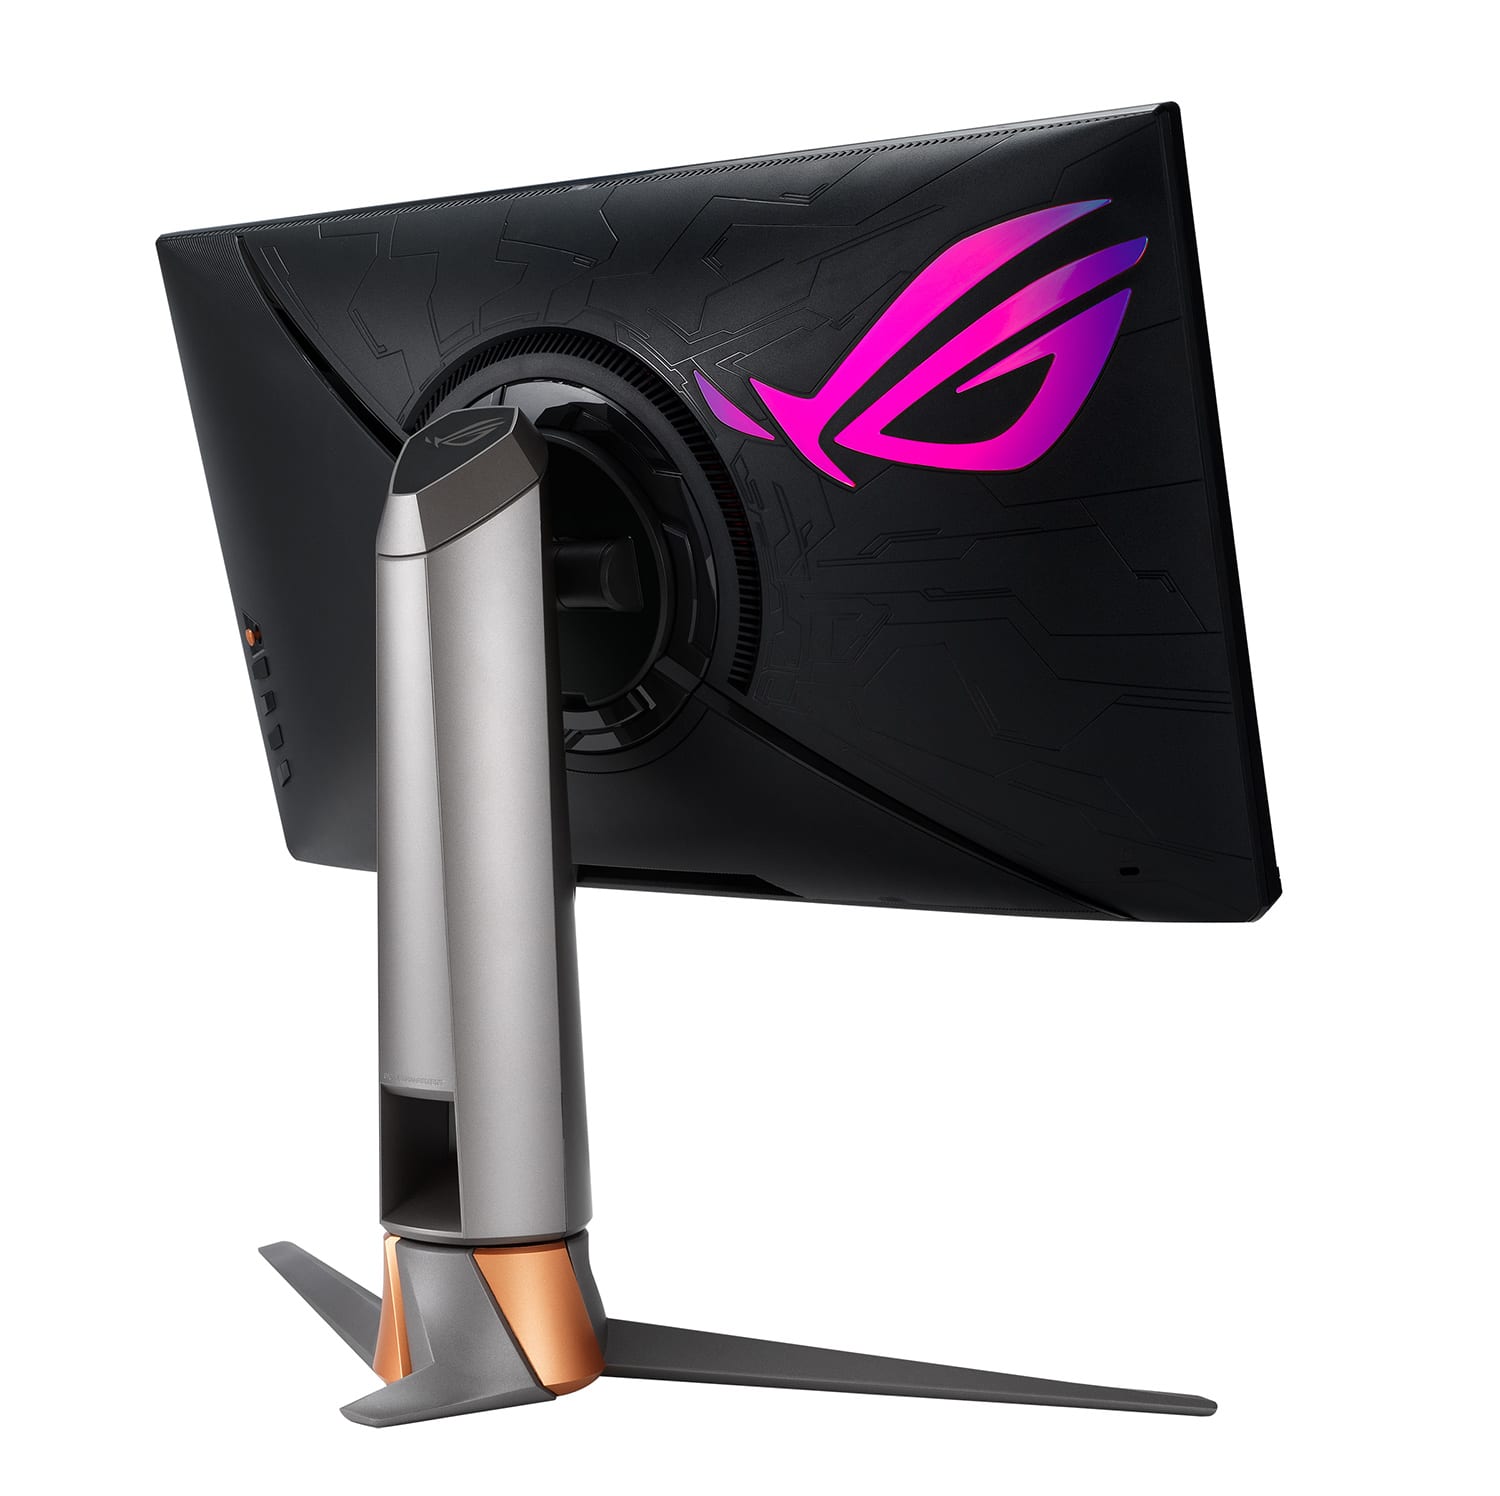
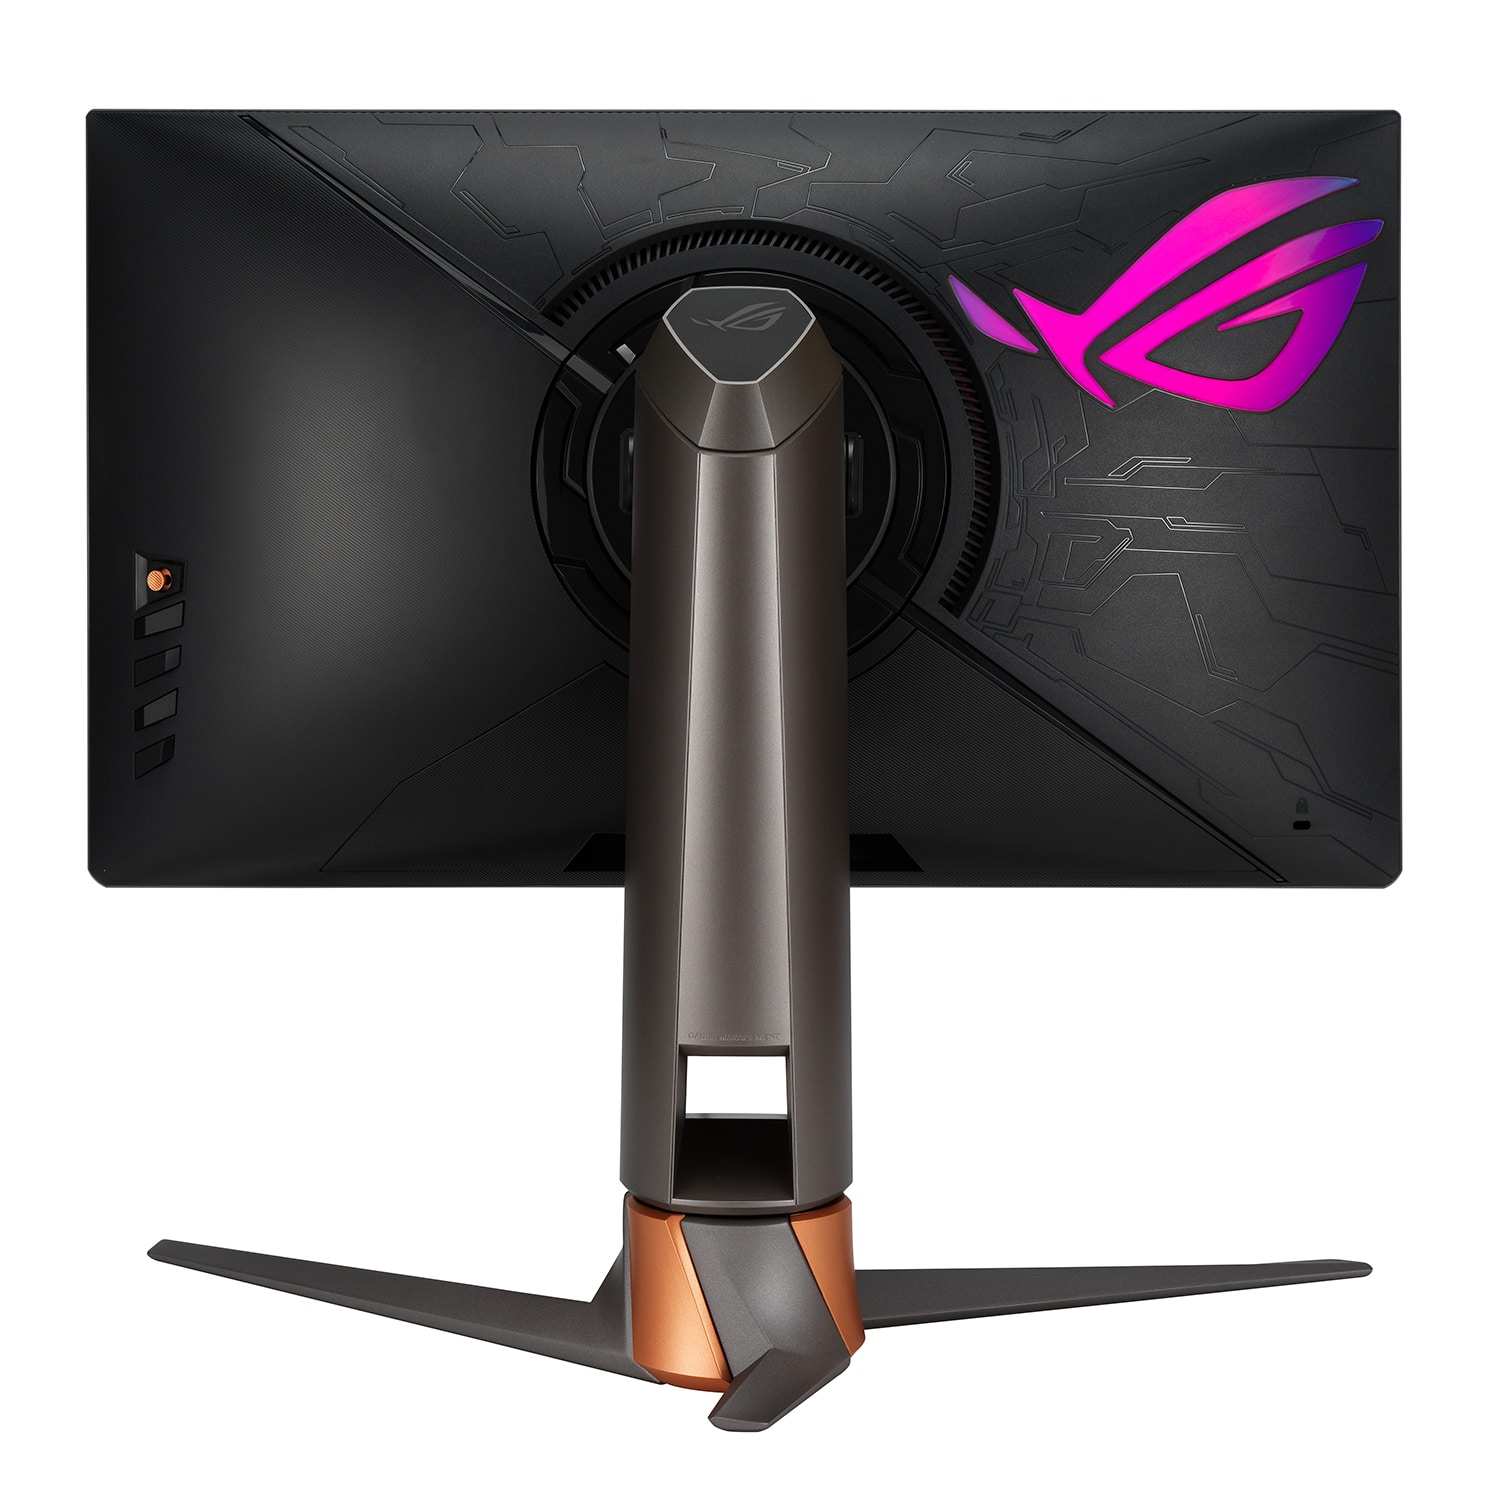
The back of the screen is encased in a matte black plastic with some etched patterns in places. There is a large ROG logo which looks silver under normal conditions but actually hides the RGB lighting system powered by Asus Aura Sync. This can be synchronized with other Aura-enabled components and peripherals. Or alternatively you can set a range of colours and patterns from within the OSD menu.

The stand is finished in a light silver plastic and provides a chunky but sturdy support for the screen. The foot is the same colour but is made of aluminium and so is strong and solid. There are some familiar copper sections to the stand as you can see from the photos as with other ROG Swift screens. The profile of the stand is quite chunky as you can see, but there’s plenty of space at the front with the fairly shallow and wide foot. If you want to you can also remove the stand and VESA mount the screen.

The stand offers a full range of ergonomic adjustments with tilt, height, swivel and even rotate provided. Tilt is smooth and pretty easy to move around. Height adjustment is smooth and easy to operate as well. At the lowest setting the bottom edge of the screen is ~60mm from the top of the desk, and at maximum extension it is ~180mm, giving a total 120mm adjustment range as advertised. Side to side swivel is smooth although a bit stiff, so sometimes you end up moving the whole screen at once a little. There’s also a rotation function offered on this screen which is smooth and easy to use if you want it. Overall the stand provides a very strong and stable support for the screen and there is basically no wobble at all which is great.
A summary of the ergonomic adjustments are shown below:

The materials were of a good standard and the build quality felt very good. There was no audible noise from the screen, even when conducting specific tests which can often identify buzzing issues. One important note here also is that despite using the v2 G-sync module this screen does not need an active cooling fan like other earlier uses of this chip. Instead Asus have used a reasonably large heatsink to help dissipate the heat, which will please those who were worried about having an audible fan for sure.
The back of the screen features all the connections as shown above. There are no additional easy-access connections on the sides of the screen or anything and connectivity is a little limited because of the use of the Native NVIDIA G-sync hardware module, although it was good to see the v2 module used here with DisplayPort 1.4 and HDMI 2.0 provided.


The OSD is controlled mainly through a joystick control that is located on the back right hand side of the screen when viewed from the front. There are a few pressable buttons as well which give you quick access by default to the GamePlus and GameVisual options, although you can also change these shortcuts in the main menu if you want. The main menu has a pretty decent range of options to play with and change. Navigation is quick, easy and intuitive thanks to the joystick control.
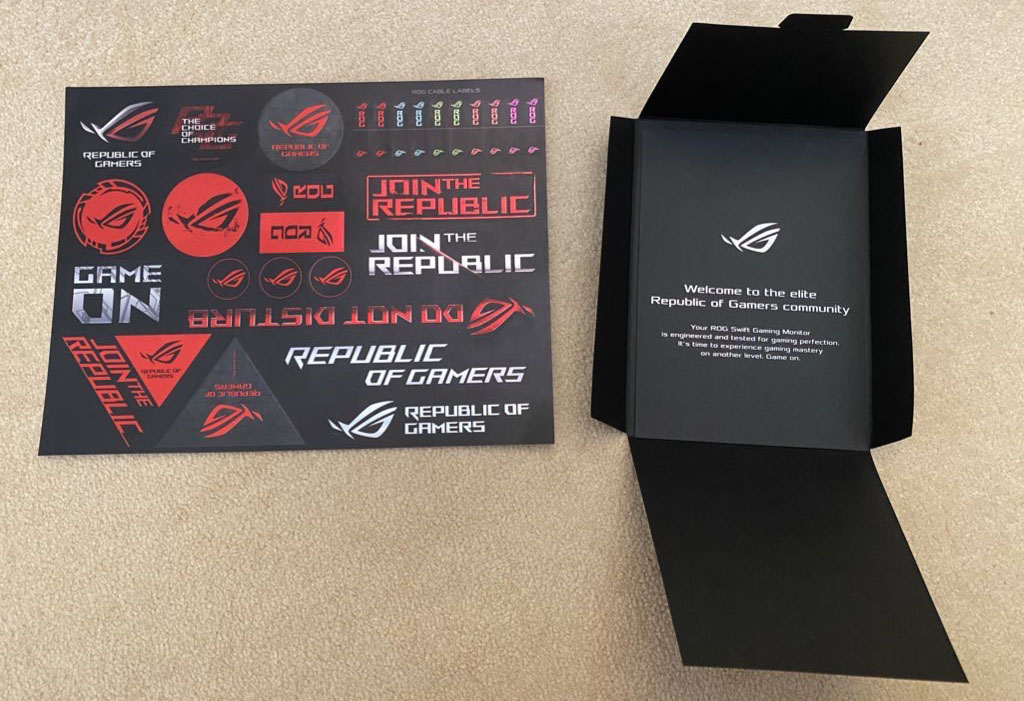
A first for any screen we’ve tested, the ROG Swift PG259QN comes with a sheet of ROG stickers as shown above so you can tart up your system/gaming area if you want. There is also an elaborately packaged “welcome” card which was a bit of an anti-climax to open to be honest and a bit unnecessary.
Panel and Backlighting

Backlight dimming at calibrated brightness setting (no PWM)

Above: backlight operation showing constant Direct Current voltage instead of PWM. Measured at calibrated brightness level
Brightness and Contrast
This section tests the full range of luminance (the brightness of the screen) possible from the backlight, while changing the monitors brightness setting in the OSD menu. This allows us to measure the maximum and minimum adjustment ranges, as well as identify the recommended setting to reach a target of 120 cd/m2 for comfortable day to day use in normal lighting conditions. Some users have specific requirements for a very bright display, while others like a much darker display for night time viewing or in low ambient light conditions. At each brightness level we also measure the contrast ratio produced by the screen when comparing a small white sample vs. a black sample (not unrealistic full screen white vs. full screen black tests). The contrast ratio should remain stable across the adjustment range so we also check that.
Graphics card settings were left at default with no ICC profile or calibration active. Tests were made using an X-rite i1 Display Pro Plus colorimeter. It should be noted that we used the BasICColor calibration software here to record these measurements, and so luminance at default settings may vary a little from the LaCie Blue Eye Pro report you will see in other sections of the review.

We made sure that a couple of settings in the OSD were turned off that could interfere with these measurements. We turned off the ‘variable backlight’ and ‘Auto SDR brightness’ options.
At the full brightness setting in the OSD the maximum luminance reached a very high 473 cd/m2 which was a considerable degree higher than the 400 cd/m2 max brightness spec from the manufacturer even. There was a decent 425 cd/m2 adjustment range in total, so at the minimum setting you could reach down to a luminance of 47 cd/m2. This should afford you a low luminance option for working in darkened room conditions with low ambient light. A setting of ~17 in the OSD menu is suggested to return you a luminance as close to 120 cd/m2 as possible at default settings. Backlight dimming is flicker free, being controlled through a Direct Current (DC) method and so there is no need PWM and people need not be concerned about associated eye strain and headache issues.


We have plotted the luminance trend on the graph above. The screen behaves as it should in this regard, with a reduction in the luminance output of the screen controlled by the reduction in the OSD brightness setting. This is a linear relationship. The average contrast ratio of the screen was measured at 1252:1 which was strong for an IPS technology panel.
Testing Methodology

An important thing to consider for most users is how a screen will perform out of the box and with some basic manual adjustments. Since most users won’t have access to hardware colorimeter tools, it is important to understand how the screen is going to perform in terms of colour accuracy for the average user.
We restored our graphics card to default settings and disabled any previously active ICC profiles and gamma corrections. The screen was tested at default factory settings using our new X-rite i1 Pro 2 Spectrophotometer combined with LaCie’s Blue Eye Pro software suite. An X-rite i1 Display Pro Plus colorimeter was also used to verify the black point and contrast ratio since the i1 Pro 2 spectrophotometer is less reliable at the darker end.
Targets for these tests are as follows:
- CIE Diagram – confirms the colour space covered by the monitors backlighting in a 2D view, with the black triangle representing the displays gamut, and other reference colour spaces shown for comparison. Usually shown as a comparison against the common sRGB space
- Colour space coverage volumes – we also measure using a piece of software called ChromaPure the colour space (gamut) volumes produced by the backlight in comparison to the sRGB, DCI-P3 and Rec.2020 colour spaces. sRGB is the most commonly used colour space so it is important to have a decent coverage from the screen here. If the colour space is >100% sRGB then the screen can produce a wider colour gamut, often reaching further in to the wider gamut DCI-P3 (commonly used for HDR) and Rec.2020 reference spaces.
- Gamma – we aim for 2.2 which is the default for computer monitors
- Colour temperature / white point – we aim for 6500k which is the temperature of daylight
- Luminance – we aim for 120 cd/m2, which is the recommended luminance for LCD monitors in normal lighting conditions
- Black depth – we aim for as low as possible to maximise shadow detail and to offer us the best contrast ratio
- Contrast ratio (static) – we aim for as high as possible. Any dynamic contrast ratio controls are turned off here if present
- dE average / maximum – we aim for as low as possible. If DeltaE >3, the color displayed is significantly different from the theoretical one, meaning that the difference will be perceptible to the viewer. If DeltaE <2, LaCie considers the calibration a success; there remains a slight difference, but it is barely undetectable. If DeltaE < 1, the color fidelity is excellent.

Default Performance and Setup
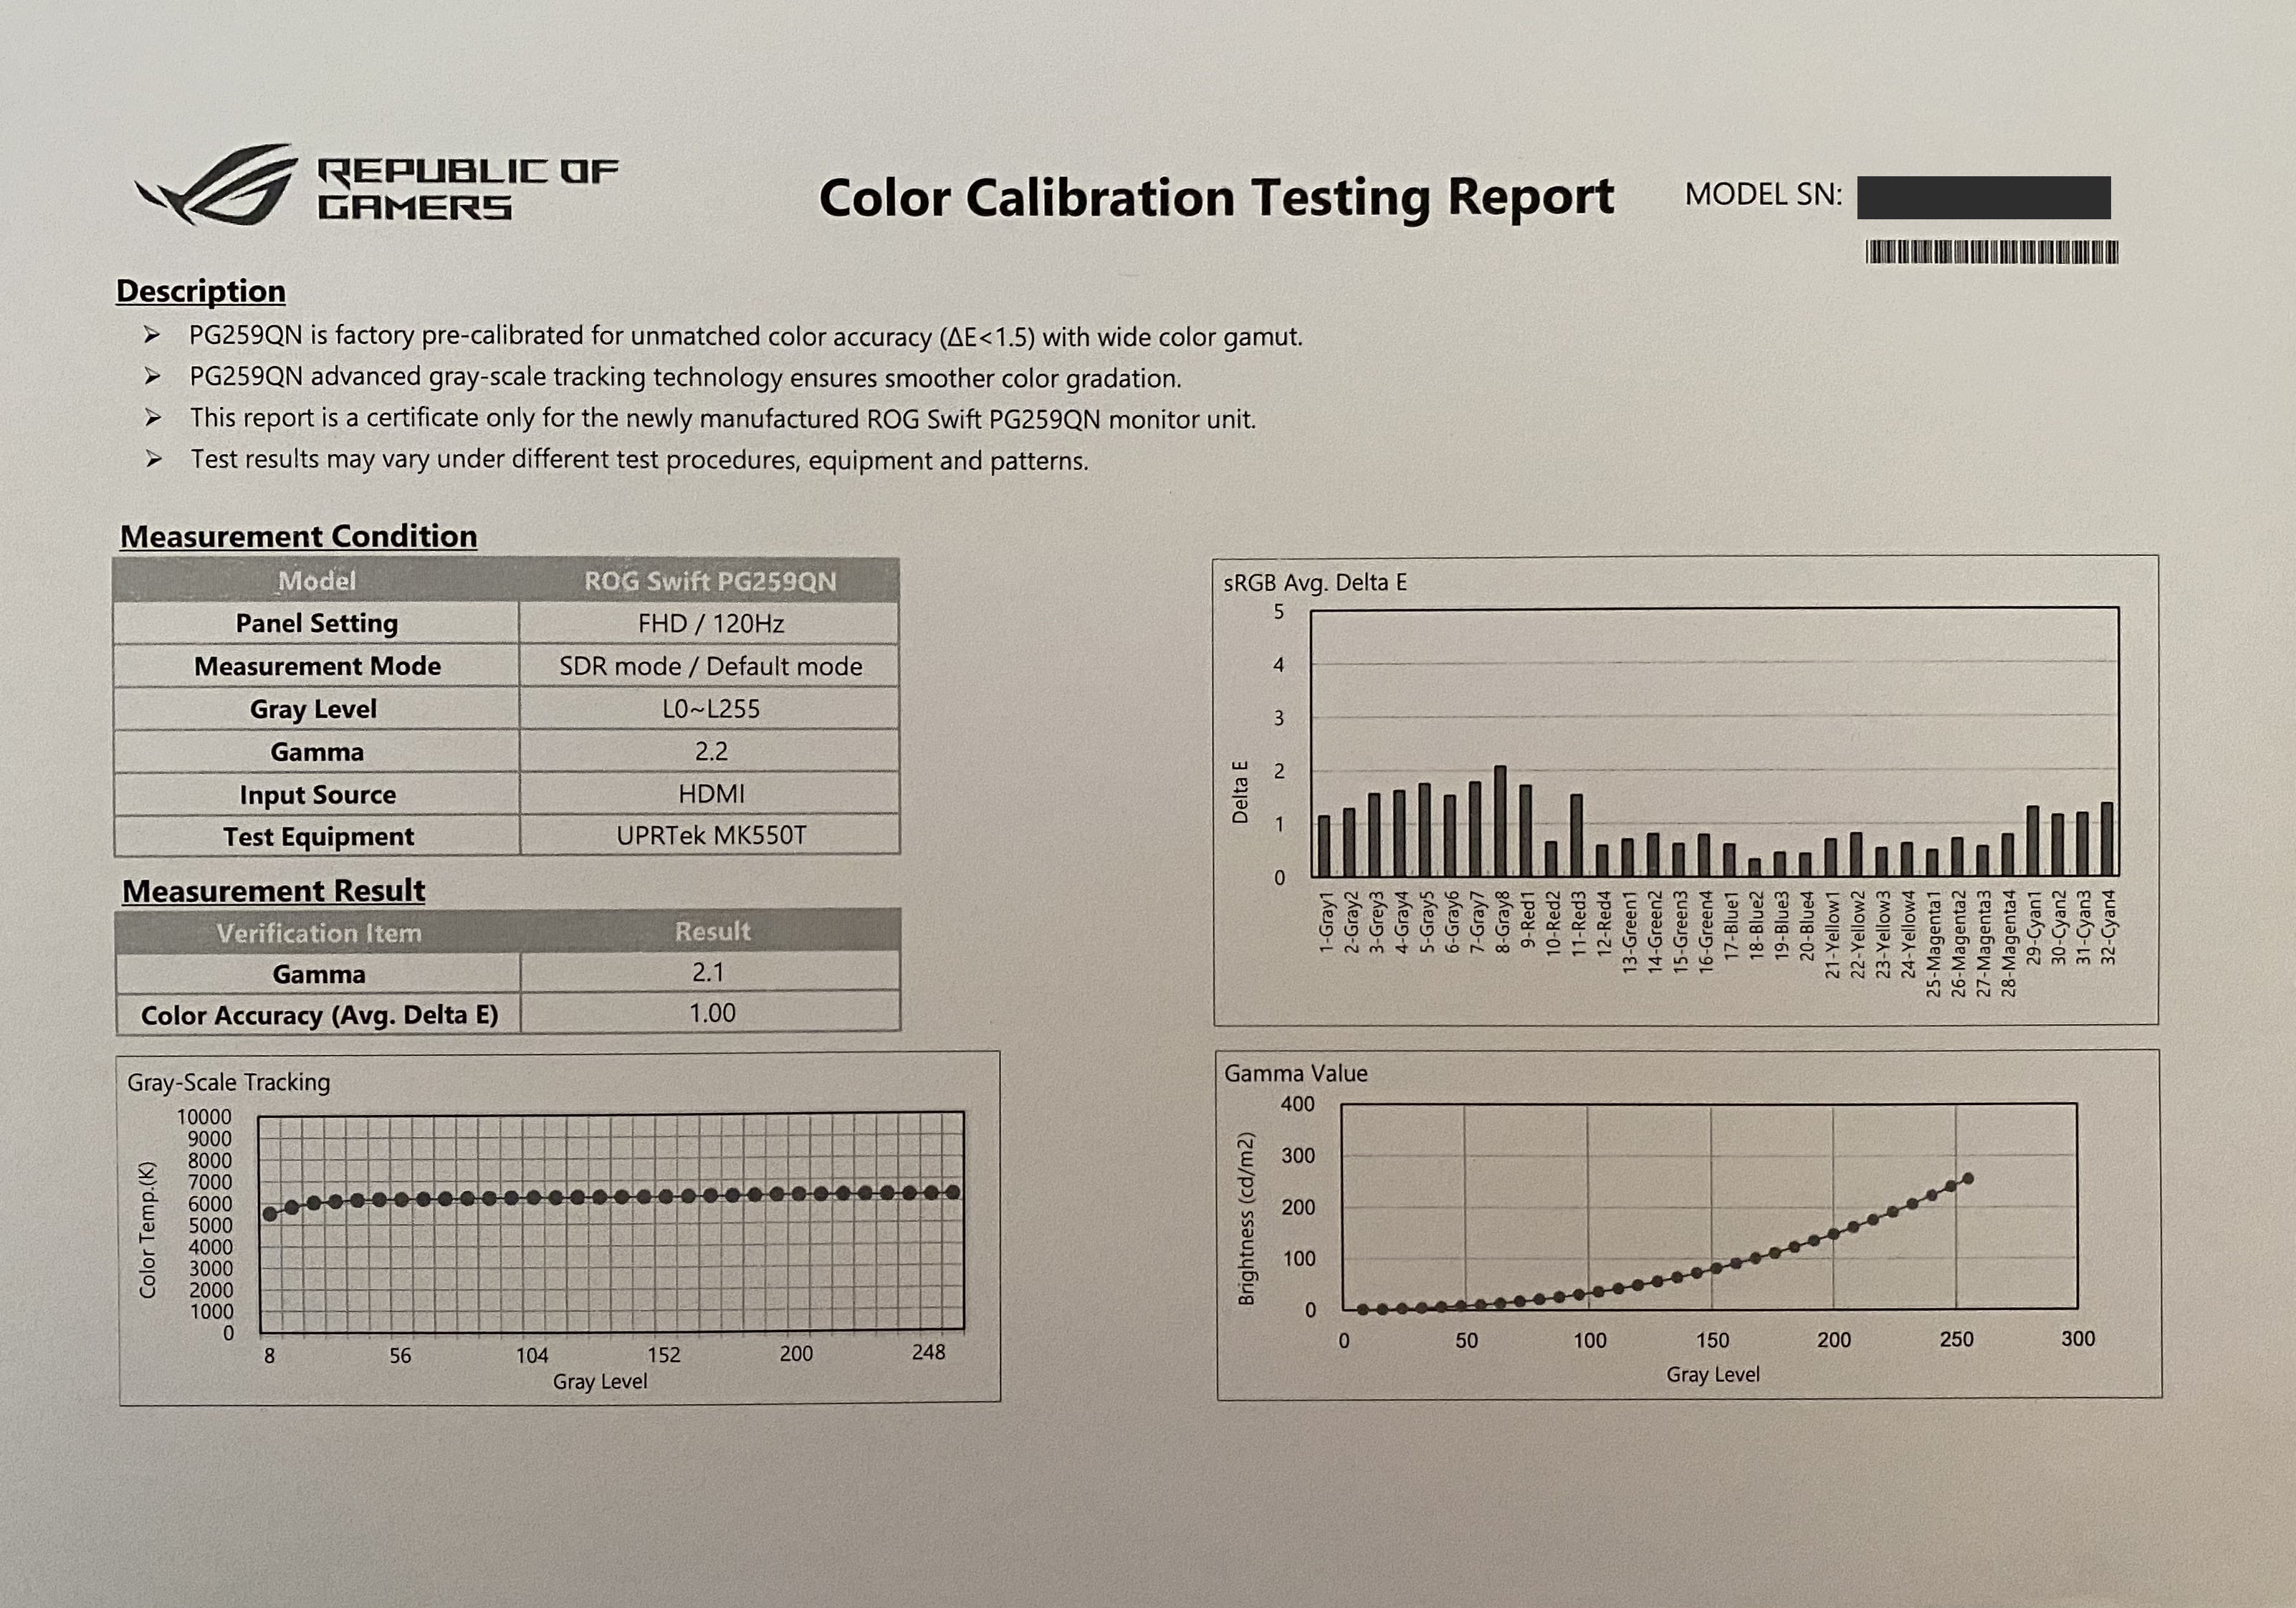
It should be noted that we turned ‘Variable backlight’ and ‘Auto SDR brightness’ in the OSD before conducting these tests, so as not to impact the measurements. The screen also carries a factory calibration in the default ‘Racing mode’ preset and in the box is a paper calibration report as shown below. Our unit has apparently been factory calibrated to a 2.2 average gamma and an impressive dE 1.0 average which if true, is excellent (target defined as being <1.5 dE). As a side note this report mentions it has been “pre-calibrated for unmatched colour accuracy (dE <1.5) with wide color gamut”, which is a bit odd as the screen only has a standard sRGB colour gamut.
Default settings of the screen were as shown below:

Out of the box the screen was set in the factory calibrated ‘Racing mode’ preset mode and with a brightness setting which was uncomfortable to use for long periods. You will want to turn that down as with most screens. The colour balance felt good out of the box and you could tell that the screen was using a standard gamut backlight. We went ahead and measured the default state with the i1 Pro 2.The CIE diagram on the left of the image confirms that the monitors colour gamut (black triangle) matches closely to the sRGB reference space (orange triangle), with some minor over-coverage in blue shades and some minor under-coverage in greens. We measured using ChromaPure software a 96.5% sRGB gamut volume coverage which corresponds to 71.7% of the DCI-P3 reference and 51.0% of the Rec.2020 reference. Being a standard gamut screen it is more suited to working with standard gamut content without the need for any emulation mode, but does lack some of the vividness and “punch” of a wider gamut screen when it comes to gaming and multimedia.
Default gamma was recorded at a 2.2 average with a small 2% deviance from the target which was great news, and slightly more accurate than the factory report had suggested (listed at 2.1 average). White point was also excellent at 6562k, being only 1% out from the target. Luminance at the default high 67% brightness level was recorded at 319 cd/m2 which is a too high for prolonged general use, you will need to turn that down. The black depth was 0.26 cd/m2 at this default brightness setting, giving us a strong 1230:1 contrast ratio for an IPS panel. Colour accuracy measurements showed an extremely impressive result with an average dE of only 0.4, and a maximum of only 1.1. The factory calibration worked extremely well here overall and we were impressed for what is really a gaming screen as well. There was no sign of any colour banding at default settings when testing gradients which was good news, and only slight gradation in darker tones evident.
We have not included our normal “optimal settings” measurement section as there’s really no need to change anything other than the brightness control here thanks to the excellent factory calibration. Turn brightness down to around 17% and you should be ready to go. Great job from Asus here!
Calibration
We used the X-rite i1 Pro 2 Spectrophotometer combined with the LaCie Blue Eye Pro software package to achieve these results and reports. An X-rite i1 Display Pro Plus colorimeter was used to validate the black depth and contrast ratios due to lower end limitations of the i1 Pro device.

The OSD settings were adjusted as shown in the table above, as guided during the calibration process and measurements. These OSD changes allowed us to obtain an optimal hardware starting point and setup before software level changes would be made at the graphics card level. We left the LaCie software to calibrate to “max” brightness which would just retain the luminance of whatever brightness we’d set the screen to, and would not in any way try and alter the luminance at the graphics card level, which can reduce contrast ratio. These adjustments before profiling the screen would help preserve tonal values and limit banding issues. After this we let the software carry out the LUT adjustments and create an ICC profile.
There was not a massive amount to correct here with the calibration process. The minor 2% deviance of the default gamma curve had been corrected now to bring us within 0% deviance of the 2.2 average. The white point was also now improved to 6497k correcting the very small 1% out of the box deviance. The brightness control adjustment was the main change and had reduced the luminance to a comfortable level now, while contrast ratio remained strong for an IPS-type panel at 1234:1 which was impressive. Colour accuracy of the resulting profile was very good, with dE average of 0.4 and maximum of 1.8. LaCie would consider colour fidelity to be very good overall. Gradients remained mostly smooth with a slight bit of banding introduced in darker tones from the profiling and adjustments. You might be just as well to use the screen without the ICC profile to be honest as the factory setup really is excellent.
You can use our settings and try our calibrated ICC profile if you wish, which are available in our ICC profile database. Keep in mind that results will vary from one screen to another and from one computer / graphics card to another.
Setup Comparisons

The comparisons made in this section try to give you a better view of how each screen performs, particularly out of the box which is what is going to matter to most consumers. We have divided the table up by panel technology as well to make it easier to compare similar models. When comparing the default factory settings for each monitor it is important to take into account several measurement areas – gamma, white point and colour accuracy. There’s no point having a low dE colour accuracy figure if the gamma curve is way off for instance. A good factory calibration requires all 3 to be well set up. We have deliberately not included luminance in this comparison since this is normally far too high by default on every screen. However, that is very easily controlled through the brightness setting (on most screens) and should not impact the other areas being measured anyway. It is easy enough to obtain a suitable luminance for your working conditions and individual preferences, but a reliable factory setup in gamma, white point and colour accuracy is important and some (gamma especially) are not as easy to change accurately without a calibration tool.
From these comparisons we can also compare the calibrated colour accuracy, black depth and contrast ratio. After a calibration the gamma, white point and luminance should all be at their desired targets.

Default setup of the screen out of the box was excellent thanks to the very thorough factory calibration. There was only a very small 2% error with the gamma, and an even smaller 1% deviance in the white point. There was a strong contrast ratio for an IPS panel as well at 1230:1 out of the box which was retained after calibration as well (not that much calibration was really needed). Colour accuracy was also excellent with an average dE of 0.4 even out of the box! Despite being clearly a gamer-orientated screen, it was good to see a focus from Asus here on reliable and accurate setup, as opposed to some gaming screens which have a large gamma deviance and seemingly very little focus on accuracy. That is particularly apparent on TN Film panels.
| Check Availability and Pricing – Affiliate Links |
|---|
| Amazon | Overclockers UK |
| TFTCentral is a participant in the Amazon Services LLC Associates Programme, an affiliate advertising programme designed to provide a means for sites to earn advertising fees by advertising and linking to Amazon.com, Amazon.co.uk, Amazon.de, Amazon.ca and other Amazon stores worldwide. We also participate in a similar scheme for Overclockers.co.uk. |
Viewing Angles
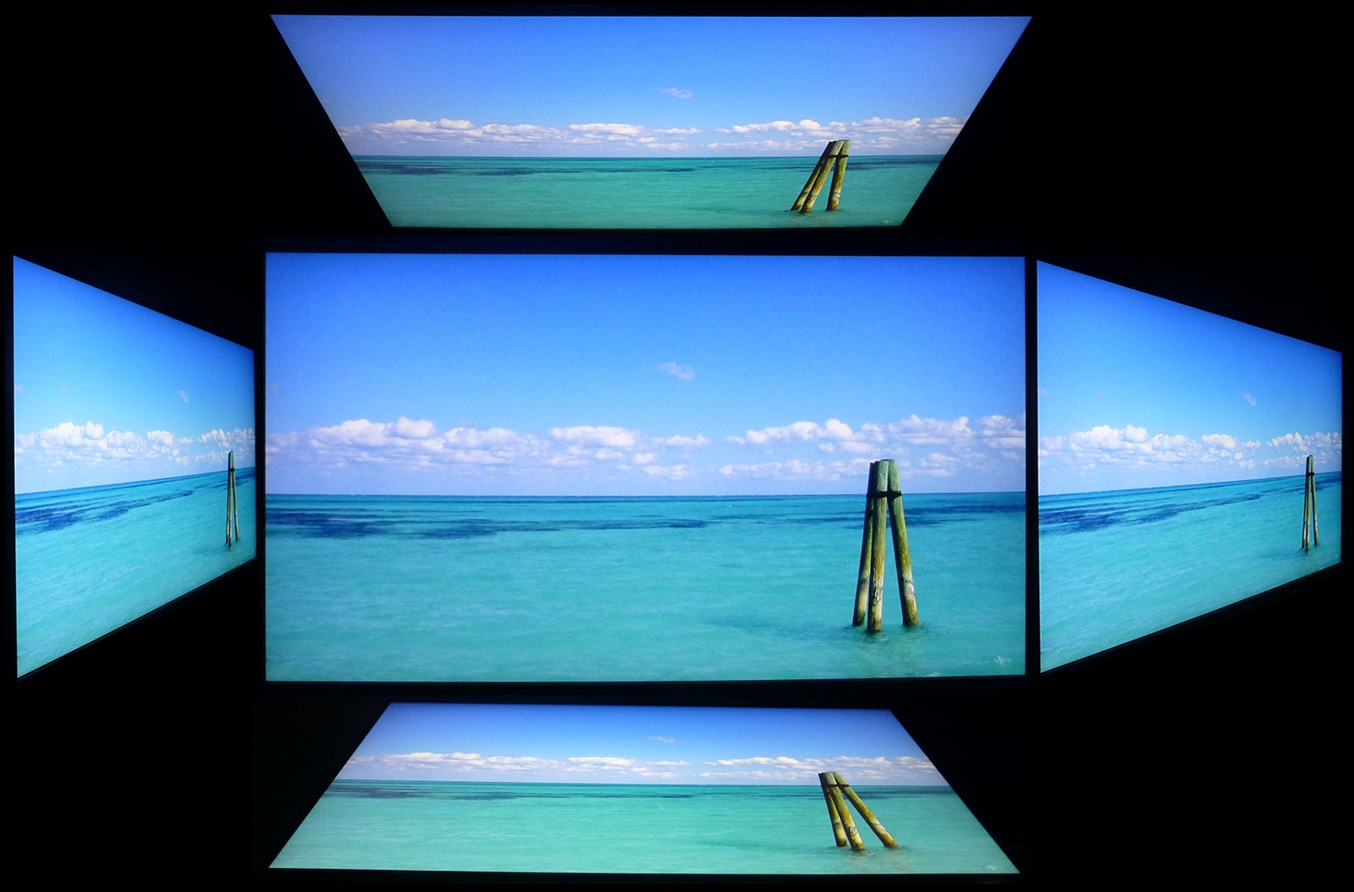
Above: Viewing angles shown from front and side, and from above and below. Click for larger version
Viewing angles of the screen were very good as you would expect from an IPS-type panel. Horizontally there was very little colour tone shift until wide angles past about 45°. A slight darkening of the image occurred horizontally from wider angles as you can see above as the contrast shifted slighting. Contrast shifts were slightly more noticeable in the vertical field but overall they were very good. The screen offered the wide viewing angles of IPS technology and was free from the restrictive fields of view of TN Film panels, especially in the vertical plane. It was also free of the off-centre contrast shift you see from VA panels and a lot of the quite obvious gamma and colour tone shift you see from some of the modern VA panel type offerings.
Above: View of an all black screen from the sides. Click for larger version
On a black image there is a characteristic pale glow introduced to the image when viewed from a wide angle, commonly referred to as IPS glow. This type of glow is common on most modern IPS-type panels and can be distracting to some users. If you view dark content from a normal head-on viewing position, you may see this glow as your eyes look towards the edges of the screen. The level of glow on this panel was the same as some other high refresh AUO IPS panels like the Acer Nitro XV273 X and Asus TUF Gaming VG279QM for instance.
This type of glow is common on most modern IPS-type panels and can be distracting to some users. If you view dark content from a normal head-on viewing position, you may see this glow as your eyes look towards the edges of the screen depending on your viewing position. It will also be more noticeable in darker ambient light conditions and if you’re viewing a lot of dark content. Some people may find this problematic if they are playing a lot of darker games or watching darker movies. In normal day to day uses you couldn’t really notice this unless you were viewing darker content. If you move your viewing position back, which is probably likely for movies and games keep in mind, the effect reduces as you do not have such an extreme angle from your eye position to the screen edges.
Panel Uniformity
We wanted to test here how uniform the brightness was across the screen, as well as identify any leakage from the backlight in dark lighting conditions. Measurements of the luminance were taken at 35 points across the panel on a pure white background. The measurements for luminance were taken using BasICColor’s calibration software package, combined with an X-rite i1 Display Pro colorimeter with a central point on the screen calibrated to 120 cd/m2. The below uniformity diagram shows the difference, as a percentage, between the measurement recorded at each point on the screen, as compared with the central reference point.
It is worth noting that panel uniformity can vary from one screen to another, and can depend on manufacturing lines, screen transport and other local factors. This is only a guide of the uniformity of the sample screen we have for review.
Uniformity of Luminance
Luminance uniformity of the screen was good overall on our sample, with 79% of the screen within a 10% deviance of the centrally calibrated area. The left hand area was a bit darker than the rest of the screen though where it dropped down to 98 cd/m2 in the most extreme example (-22%).
Backlight Leakage

We also tested the screen with an all black image and in a darkened room. A camera was used to capture the result. There was no noticeable backlight bleed or leakage on our sample which was great news. Off-angle IPS glow is discussed in the previous section.
Note: if you want to test your own screen for backlight bleed and uniformity problems at any point you need to ensure you have suitable testing conditions. Set the monitor to a sensible day to day brightness level, preferably as close to 120 cd/m2 as you can get it (our tests are once the screen is calibrated to this luminance). Don’t just take a photo at the default brightness which is almost always far too high and not a realistic usage condition. You need to take the photo from about 1.5 – 2m back to avoid capturing viewing angle characteristics, especially on IPS-type panels where off-angle glow can come in to play easily. Photos should be taken in a darkened room at a shutter speed which captures what you see reliably and doesn’t over-expose the image. A shutter speed of 1/8 second will probably be suitable for this.
General and Office Applications

This screen is clearly aimed firmly at gaming, but what about if you want to do some more general work on it too? With a 1920 x 1080 resolution, the desktop real estate of the PG259QN feels a fairly big step down compared with all the high resolution panels we’ve tested, and the 27″ 2560 x 1440 models we are used to using day to day. You do lose a large amount of desktop space, and although side by side split screen working is possible, it’s not as easy due to the more limited resolution and space. With a 0.2825mm pixel pitch, text is comfortable and easy to read natively, providing a sharp and crisp image. It is not as sharp as the 1440p panels we’ve become accustomed to, or of course any ultra HD/4K resolutions where scaling is used, but it is perfectly adequate. It’s better than when the same resolution is used on a 27″ model though.
The light AG coating of the IPS technology panel is certainly welcome, and avoids unwanted graininess while still retaining solid anti-glare properties. The wide viewing angles provided by this panel technology on both horizontal and vertical planes, helps minimize on-screen colour shift when viewed from different angles too and make it well-suited to colour critical and photo work too if needed. The brightness range of the screen was good, with the ability to offer a luminance between 473 and 47 cd/m2. This should mean the screen is useable in a wide variety of ambient light conditions, including darkened rooms. A setting of 17 in the OSD brightness control should return you a luminance close to 120 cd/m2 out of the box. The brightness regulation is controlled via a flicker free backlight, without the need for Pulse Width Modulation (PWM), and so those who suffer from eye fatigue or headaches associated with flickering backlights need not worry.

Spectral distribution graph showing calibrated mode at 6500k
Spectral distribution graph showing Level 4 blue light mode
There are some low blue light modes available in the OSD as well, if you want to create a warmer colour temperature and reduce the blue light output of the screen. These can be useful particularly at night when working with a lot of text or browsing the internet. There are 4 modes available which get progressively more yellow in appearance as you increase them. We measured the white point relative to our calibrated 6500k and found level 1 = 5658k, level 2 = 5558k, level 3 = 5463k which offer only small jumps in colour temperature and appearance. There is then a more noticeable jump to level 4 where the image becomes far more yellow / slightly green which we measured at 4552k.
There are 2x USB 3.0 ports provided on the screen although both are on the back so not particularly easy access. There are no other extras like ambient light sensors, motion sensors or card readers on this screen which are sometimes useful for office-type uses. There is a very good range of ergonomic adjustments from the stand with tilt, height, swivel and pivot offered. There is also VESA 100mm mounting capabilities for those who want to mount the screen instead although the stand is strong and sturdy overall.
Responsiveness and Gaming

The screen uses overdrive technology to boost pixel transitions across grey to grey changes as with nearly all modern displays. The part being used is a AU Optronics M250HAN03.0 Fast IPS (AHVA) technology panel. Have a read about response time in our specs section if you need additional information about this measurement.
We use an ETC M526 oscilloscope for these measurements along with a custom photosensor device. Have a read of our response time measurement article for a full explanation of the testing methodology and reported data.


Response Times and Refresh Rate
There’s various things you need to consider when it comes to response times and gaming, particularly on a display with high refresh rate support. Gaming screens invariably give you a control for the overdrive impulse in the OSD menu which can help you tweak things, but response time performance and overshoot levels can vary depending on the active refresh rate. This behaviour is often different depending on whether the screen is a traditional G-sync screens (with hardware module) or whether it’s an adaptive-sync screen as well, and not all screens behave in the same way. We always try to test each variable in our reviews but the key considerations you need to make are:
- Performance at 60Hz – this is important if you want to use an external games console (or other device like a Blu-ray player etc) which typically run at 60Hz. Response time performance may well be different than at the higher refresh rates supported, and you may need a different overdrive setting for optimal experience.
- Performance during VRR (Variable Refresh Rate) – bearing in mind that the refresh rate will fluctuate anywhere from 1Hz up to the maximum supported by the screen (e.g. 1 – 144Hz on a 144Hz display). It’s important to understand if the response times and overshoot will vary as the refresh rate changes. There may be a need to switch between different overdrive settings in some cases, depending on your usually attained refresh rate output and graphics card capability. This can sometimes become fiddly if your refresh rates fluctuate a lot, especially between different games, so it’s always easier if you can leave a display on a single overdrive setting which is suited to the whole range. Some screens also feature “variable overdrive” which helps control the response times and overshoot depending on the active refresh rate. This is particularly apparent with traditional G-sync module screens.
- Performance at fixed refresh rates including maximum – this is important for those who have a powerful enough system to consistently output a frame rate to meet the max refresh rate capability of the screen. They may want to run at max refresh rate without VRR active, or even is VRR is active they may know they will be consistently at the upper end of the range. Many gaming screens show their optimal response time performance at the maximum refresh rate. Knowing the performance at high fixed refresh rates may also be applicable if you want to use any added blur reduction backlight which typically operate at a fixed refresh rate.
- Whether the response times can keep up with the frame rate – you will also want to consider whether the response times of the panel can consistently keep up with the frame rate. For instance a 144Hz screen sends a new frame to the display every 6.94ms, so the pixel response times need to ideally be consistently and reliably under this threshold. If they are too slow, it can lead to added blurring in practice and sometimes make the higher refresh rates unusable in real life. We consider this in our analysis.

We carried out some initial response time measurements and visual tests in each of the overdrive settings, and at a range of refresh rates. The overdrive control is available in the OSD menu via the ‘OD’ option with 3 levels available – Off, Normal and Extreme. We first of all tested the different response time modes at the maximum 360Hz native resolution:


The response time performance improved as you increased the OD setting unsurprisingly. With it turned off there was a more noticeable blur to the moving image including some black smearing where the response times were not fast enough at all to keep up with the frame rate. Thankfully switching up to the middle ‘Normal’ mode brought about some marked improvements in performance with a much clearer and sharper moving image. This helped improve motion clarity a lot, and we had an average response time measured now of 3.1ms G2G which was excellent. Remember that this is from a small sample set of measurements so we will re-measure that with a wider range of transitions in a moment. At the ‘Normal’ setting there was a little bit of pale overshoot apparent where the overdrive impulse was a little too high, but nothing too major. If you increased the OD setting up to ‘Extreme’ mode there was no major improvement in response times, but the overshoot was much higher and far more noticeable. You had pale halos and trails behind moving objects which was distracting. The middle ‘Normal’ mode was optimal here.
Across the Refresh Rate Range


We measured the response times across the refresh rate range in the optimal ‘Normal’ OD mode as well which gives you an idea of how the panel will perform when using G-sync for variable refresh rates as well. You can see here that like other Native G-sync screens with the hardware module from NVIDIA the PG259QN features variable overdrive. As a result the response times slow down a bit as the refresh rate lowers to help keep any overshoot in check. This is fine as the frame rate is also reducing so the response times don’t need to be quite as fast at the lower refresh rates. Motion clarity is obviously better with the higher refresh rates, and the overshoot levels remained pretty consistent with some slight pale artefacts across the refresh rate range.
Variable Refresh Rates (VRR)

The screen features a Native G-sync hardware module and so is designed to primarily support variable refresh rates from NVIDIA systems. However, thanks to the more modern firmware we confirmed that the screen also works for FreeSync from AMD systems when connected over DisplayPort. This is great news as it means that you don’t have to be forced in to having an NVIDIA graphics card now or in the future if you want to enjoy what this screen can offer. We should note though that VRR is not supported over HDMI sadly, so you cannot connect to the screen using that interface for PC gaming if you want to use G-sync or FreeSync. This also means that it will not support VRR for games consoles unfortunately.
The VRR range supported is between 1 and 360Hz maximum over DisplayPort. Being a Native G-sync screen with hardware module it should give a high level of assurance about the VRR experience and performance as well, as this proprietary chip is long established in the market and performs very well in these situations. It also allows for additional benefits like variable overdrive (discussed above) and ultra-low input lag (measured below). Since the v2 module is being used here in order to provide sufficient bandwidth to power 1080p at 360Hz, and to provide modern DP and HDMI interface options, it also means that the screen can support HDR input signals. We will talk a bit more about HDR later but there isn’t any meaningful support here (no local dimming, no wide gamut colour space) and so it can’t do much beyond just accepting an HDR input.
The support for G-sync and FreeSync will be very useful given the significant system demands of running a screen up to 360Hz refresh rate. Keep in mind you are going to need a modern card to support G-sync from NVIDIA and certainly something powerful given the system demands of this refresh rate. You might also want to read our newly updated article about Variable Refresh Rates here for more information.
Detailed Response Times
For a screen that runs up to 360Hz the presence of G-sync was very welcome of course. The ‘Normal’ OD (overdrive) mode was optimal from our tests and thanks to variable overdrive from the G-sync module, you don’t have to worry about changing this at different refresh rates. The higher refresh rates supported by the screen really do help improve motion clarity and reduce perceived blur, making the screen far better for gaming than 60Hz-only models. There is a huge improvement when going from 60 > 144Hz for gaming, and a lesser but still noticeable improvement when jumping up to 240Hz. We did various side by side comparisons and could see another small improvement when pushing up to 360Hz as well. Motion felt a bit sharper and more snappy overall. We will provide some pursuit camera photos in a moment and talk about this a bit more.
Recommended Settings
| Optimal Refresh Rate | 360Hz |
| Optimal Overdrive Setting (for above) | Normal |
| Optimal Overdrive Setting for 60Hz | Normal |
| Optimal Overdrive Setting for VRR | Normal |
Detailed Measurements at 360Hz, OD = Normal


We carried out some further response time measurements at 360Hz with a wider range of transitions measured to give us a more complete picture of the performance. Overall there was a very impressive 2.6ms G2G response time which was excellent, and shows that this new 360Hz IPS panel is super-fast. These are really TN Film-like response times, delivered here from an IPS panel without the sacrifices you have to make with TN when it comes to viewing angles, image quality and colours. It’s the fastest IPS panel we’ve tested to date by a decent margin.
The lowest response time we measured was 1.4ms in the ‘Normal’ overdrive mode, so the quoted 1ms G2G figure in the spec is really reserved it seems for when you use the ‘Extreme’ mode, which in practice you’d never really want to do because of the high overshoot levels. In this normal mode there was a little bit of overshoot creeping in, and you could see some slight pale halos and artefacts on moving content sometimes, but it was not very obvious or distracting thankfully and we felt overall the balance was good here.
Refresh Rate Compliance

In this section we look at the response time behaviour across the range of supported refresh rates and consider whether they are sufficient to keep up with the frame rate demands of the screen. The grey line on the graph shows the refresh rate threshold, that being the average G2G response time that the panel needs to be able to achieve to keep up properly with the refresh rate and frame rate. For instance at a 60Hz refresh rate the response times need to be consistently and reliably under 16.67ms, while at 144Hz refresh rate the response times ideally need to be under 6.94ms to keep up with the frame rate demands. If they are not then this can lead to some additional smearing and blurring on moving content as the pixels can’t keep up. For these tests we will plot the average G2G figure at a range of measured refresh rates, while operating at the optimal overdrive control.
The table to the right then explains whether that overdrive control needs to be adjusted by the user depending on the refresh rate (not ideal), or whether adaptive overdrive is utilised to keep things simple. Ideally you’d want to be able to stick with a single mode for all refresh rates especially when you consider how these will vary during VRR. We also include a measurement of the % of the overall response time measurements that were within the refresh rate, as well as a slightly more lenient measurement of how many were within the refresh rate window within a 1ms leeway.

The performance of the ROG Swift PG259QN was very good overall although as you pushed up in to the very upper end of the refresh rate range some transitions struggled to quite keep up. At the max 360Hz around 2/3 of the transitions were within the very short 2.78ms refresh rate window which is a challenge for any panel technology really (other than OLED). If we allow for a reasonable 1ms tolerance then 80% of the measured transitions were within the window which was very good. In reality with an average response time of 2.6ms G2G the screen performed very well and there was no real issue with added smearing in practice. If the response times had been just slightly quicker then maybe the image would have been marginally sharper and clearer at the upper refresh rates, but it was still excellent when it came to motion clarity, and we would rather the overdrive impulse was not pushed too far as we don’t want a load of added overshoot to get there!
Gaming Performance

Above: pursuit camera photos at 360Hz, Overdrive = Normal
We also captured some pursuit camera photos which are designed to capture the real motion clarity you would perceive with the naked eye in practice. At 360Hz shown above the image looked sharp and crisp and the motion clarity was excellent overall. There was a little bit of pale haloing behind the moving object caused by the overshoot we measured on some pixel transitions but it was nothing major really.

Above: pursuit camera photos on the PG259QN at a range of refresh rates to capture perceived motion clarity
One of the biggest questions people are going to have is whether 360Hz really makes much difference to your average user? This is a tricky one to answer as it really is going to depend on various factors. The screen is aimed primarily at esports gamers and so where every millisecond counts, the super-fast response times, excellent motion clarity and higher frame rate support could well make a difference. If you want the latest and greatest option in the LCD monitor market then it’s an attractive option and that’s really the PG259QN’s target market.
Asus’ website talks about the target market a bit more and the kind of gamers the screen is aimed at: “ROG Swift 360 Hz PG259QN is ideal for fast-paced esports titles like Counter-Strike: Global Offensive, Rainbow Six: Siege, Overwatch, and Fortnite. In a world where milliseconds count, the blazing-fast 360 Hz refresh rate is the difference between victory and defeat. In the world of competitive sports, a 4% difference is a game changer. To put this into context, in the 2016 Summer Olympics, 1% determined the difference between silver and gold in both men’s and women’s 100m and 200m dashes.”

End to end system latency measured in ms using click to photon response time in Overwatch. Source: NVIDIA
What about if you’re a more average consumer? If you’re coming from a 60Hz screen then the improvements are absolutely undeniable, and so if you’re making that jump now then 360Hz will offer you the absolute best motion clarity, response times and frame rate support you can get from an LCD monitor currently. There’s a big jump though going from 60Hz to 144Hz as well though, and those screens are far more readily available and more affordable with a range of sizes and resolutions also supported. It probably boils down to how much you’re willing to spend for your upgrade, and whether you are happy with some of the limitations of this model in terms of size and resolution.
If you’ve already got a high refresh rate screen at 144Hz we could see still some decent improvements as you go to 240Hz as well, captured nicely in the pursuit camera photos above. There is then another small improvement we felt moving to 360Hz, not as significant but it it there. The image felt a bit sharper and smoother and performance felt a bit more snappy. Don’t forget that to make use of the 360Hz refresh rate you’re really going to have to have a powerful system and graphics card, or be playing the kind of games where you can push super-high frame rates > 300fps. If you are in that position then the 360Hz refresh rate here allows you to properly support frame rates from 240 – 360fps that otherwise a “slower” screen could not handle.
Not everyone is going to see that but having tested hundreds of monitors and having a standardised process for comparison, as well as being able to do nice side by side comparisons, to our eye it showed some marginal improvements. Because the improvements aren’t huge when going from 240Hz to 360Hz, some people may again prefer to look for one of the more common 240Hz options where there is more choice currently including some higher resolution models too. The PG259QN is the first venture in to this space though, so in time there will be further options available for sure.
10-Bit Colour Depth
We also briefly wanted to mention the colour depth support for this screen. The panel is 8-bit+FRC and so can support a 10-bit input source and display 1.07b colours. If you’ve got a suitable graphics card and driver this means you can enjoy 10-bit capable games and content where supported. At the maximum 360Hz refresh rate the bandwidth is not sufficient to allow 10-bit colour depth so you are forced to drop down to 8-bit. It’s quite hard in reality to see much difference in practice, and many games don’t even support 10-bit anyway so it’s not really a concern.
Resolution and Size
We also want to touch on the resolution and size of this screen for consideration. The screen is only a pretty small 24.5″ in size, and so is a lot smaller than the wider range of 27 – 32″ monitors on the market, and the varied selection of ultrawide 34 – 38″ models too. A smaller screen might be preferable to some people for their close up PC gaming though and is still a popular choice for professional gamers and esports. It’s currently the only size available if you want to the latest and greatest 360Hz refresh rate, although we would probably expect to see 27″ models appear at some point (with the same resolution).
From a resolution point of view the 1080p maximum is certainly more limiting when it comes to general use, office work, photo editing etc and you do miss the desktop space and size of the larger screens with 1440p and above. However, keep in mind this is aimed at gaming and to reach 360Hz refresh rate is going to be a major challenge for any system even at only 1080p. Anything higher would have been impractical at the moment to power, and unnecessary also on a smaller 24.5″ sized screen. Again 1080p is still a popular choice for hardcore gamers.
Ultra Low Motion Blur (ULMB)

There is a motion blur reduction backlight mode available on this screen as well, accessible via the ‘ULMB’ (Ultra Low Motion Blur) setting. This can only be used if you disable G-sync first of all from your graphics card, and then is selectable when running at fixed refresh rates of either 144Hz or 240Hz. It is not available at any other refresh rates, including unfortunately at the maximum 360Hz level. Although you can only use this without VRR active, playing a lower fixed refresh rate is likely to be more achievable anyway. This mode should only be used for gaming as the strobing of the backlight will lead to eye strain and other issues in all likelihood if used for normal static desktop-type work.

Above: strobing at 240Hz. Horizontal scale is 5ms

Above: strobing at 144Hz. Horizontal scale is 5ms
At the maximum supported 240Hz refresh rate the strobing is in sync with the refresh rate, pulsing every 4.17ms. At 144Hz is strobes every 6.94ms in sync with the refresh rate again. The brightness control in ULMB mode is independent to your normal usage which is great news, so you can customise the screen to how you like with it turned on (likely to be brighter than your desktop brightness setting), without worrying about changing again when you turn it off. There is a ‘Pulse Width’ setting available within the OSD as well once ULMB is activated that lets you control the length of the strobes ‘on’ period. It is available in increments of 20 from 100 down to 0. As you decrease the setting it impacts the brightness of the screen as well, as the ‘on’ period of the strobe is reduced each time. We experimented with the pulse width setting and to be honest it didn’t seem to improve the experience at all, and we’d rather stick with the default 100 level and use the brightness slider to change to a comfortable brightness level where there’s a bit more control. At maximum brightness the screen could reach 225 cd/m2 luminance with ULMB mode enabled at both 144Hz and 240Hz.

Above: pursuit camera photo from top, middle and bottom areas of the screen with ULMB turned on
We took a pursuit camera photo with MBR enabled as shown above. There was little difference across the whole screen with the image which was good, and helped keep the image fairly uniform wherever your eyes were focused. This mode appeared to be quite a bit clearer at 144Hz than 240Hz though, where there was a more noticeable after image caused by the strobe cross-talk. At 144Hz we felt it offered some pretty decent blur reduction benefits actually, so if you are running a less powerful system and can’t push in to the upper frame rates beyond 144Hz then this might be a viable mode to experiment with to improve the clarity in gaming a bit further. If your system can manage to drive higher refresh rates of 200 – 360Hz then the motion clarity without it on is excellent anyway, and you’re probably going to find using G-sync/FreeSync more beneficial to support the variable refresh rates and avoid tearing.
Gaming Comparisons

We have provided a comparison of the display against many other gaming screens we have reviewed in a similar size range and across a range of panel technologies. This table is now split by panel technology to make life a bit easier and for quicker comparison.

These are TN Film-like response times and the fastest IPS panel we have tested to date! You get excellent motion clarity, high refresh rate, high frame rate support and super-low response times without needing to sacrifice in other areas like image quality, viewing angles and colours.
Additional Gaming Features

- Aspect Ratio Control – the screen offers two modes in the menu for ‘full’ and ‘aspect’. The latter should be fine for helping to handle any unusual input resolutions and aspect ratios, although there’s no specific 1:1 pixel mapping mode offered here.
- Preset Modes – There are a decent range of gaming preset modes available to select and configure including modes for Racing, RTS/RPG games, and esports mode.
- Additional features– there are some additional options in the ‘GamePlus’ menu including a stopwatch, crosshair graphic options, time, FPS counter and display alignment. Elsewhere in the main menu there is also a ‘Dark Boost’ setting for tweaking the gamma curve in darker tones to help bring out details.
Lag
Read our detailed article about input lag and the various measurement techniques which are used to evaluate this aspect of a display. The screens tested are split into two measurements which are based on our overall display lag tests and half the average G2G response time, as measured by our oscilloscope. The response time element, part of the lag you can see, is split from the overall display lag and shown on the graph as the green bar. From there, the signal processing (red bar) can be provided as a good estimation of the lag you would feel from the display. We also classify each display as follows:
Lag Classification
- Class 1) Less than 8.33ms – the equivalent to 1 frame lag of a display at 120Hz refresh rate – should be fine for gamers, even at high levels
- Class 2) A lag of 8.33 – 16.66ms – the equivalent of one to two frames at a 120Hz refresh rate – moderate lag but should be fine for many gamers. Caution advised for serious gaming
- Class 3) A lag of more than 16.66ms – the equivalent of more than 2 frames at a refresh rate of 120Hz – Some noticeable lag in daily usage, not suitable for high end gaming


The total lag measured was a very impressive 1.75 ms total. The pixel response times account for around 1.30ms, and so we can say that there appears to be around 0.45ms of signal processing lag on this screen which is super low. A solid result from this display and making it suitable for fast and competitive gaming and in keeping with other Native G-sync hardware module screens.
Movies and Video
The following summarises the screens performance for videos and movie viewing:
| Category | Display Specs / Measurements | Comments |
| Size | 24.5″ widescreen | Fairly small for a desktop monitor nowadays and smaller than TV’s by a lot |
| Aspect Ratio | 16:9 | Well suited to most common 16:9 aspect content and input devices |
| Resolution | 1920 x 1080 | Can support native 1080p content, but not Ultra HD natively |
| HDCP | Yes v2.2 | Suitable for encrypted content |
| Connectivity | 1x DisplayPort 1.4 1x HDMI 2.0 | Useful additional HDMI input for external Blu-ray players or games console although only one provided |
| Cables | DisplayPort and HDMI | Both cables provided in the box |
| Ergonomics | Tilt, height. swivel, rotate | Good set of adjustments suitable to positioning the screen in a variety of angles for different viewing positions. Stable and sturdy stand |
| Coating | Light Anti-glare | Provides clear image with no graininess, but avoids unwanted reflections of full glossy solutions |
| Brightness range | 47 – 473 cd/m2 (SDR) | Good adjustment range offered including a high max brightness and decent darkened room adjustment range. Backlight dimming is also free from PWM. |
| Contrast | 1234:1 after calibration | Strong contrast ratio for an IPS technology panel, although not as high as you can get from VA panels |
| Preset modes | Cinema | There is a cinema mode available which may be useful if you want to set up a different mode for movie viewing. |
| Response times | 2.6ms G2G with fairly low overshoot at 360Hz. 4.9ms G2G at 60Hz | Response times are excellent and the ‘Normal’ OD mode was optimal at all refresh rates. Great motion clarity at higher refresh rates |
| Viewing angles | Very good | Thanks to the IPS panel technology, suitable for viewing from a wide range of positions. Pale IPS glow on dark content could present a problem from some wider angles especially in darker room conditions |
| Backlight bleed | No bleed | No noticeable bleed or leakage on our sample. Will vary from sample to sample |
| Audio | Headphone output | A headphone jack is provided for audio pass-through but no speakers |
| Aspect Ratio Controls | Full and Aspect modes | The default 16:9 aspect ratio is likely to serve most needs here anyway but there’s an ‘aspect’ mode too to handle other ratios |
| PiP / PbP | Not supported | Neither available |
| HDR support | Nothing meaningful | It can accept an HDR input source, but is only certified to the rather meaningless HDR 400 standard which does not require any form of local dimming and so cannot offer improved dynamic range/contrast. There is also only a standard sRGB gamut offered here and while 10-bit colour depth is supported, there’s limited overall colour benefits too for HDR |
Conclusion
If you enjoy our work and want to say thanks, donations to the site are very welcome. If you would like to get early access to future reviews please consider becoming a TFT Central supporter.
It’s always great to test new technologies and advancements in the monitor market and the ROG Swift 360Hz PG259QN didn’t disappoint! It’s firmly aimed at gamers who want the latest and greatest specs and it delivered extremely good performance for these needs. The 360Hz refresh rate provided excellent motion clarity, including pretty sizeable benefits over 120/144Hz options and what we felt was a small but noticeable bump up from 240Hz too. The extra refresh rate allows you to support even higher frame rates, so if this is your aim then you’ve got another 50% room compared to 240Hz options. Response time performance was excellent too and on the whole kept up pretty nicely with the frame rate demands and ensured smooth and crisp images. It was the fastest IPS panel we’ve tested to date, has minimal overshoot and offered TN Film-like response times without the sacrifices of that technology. Is there really much need to use TN Film any more when IPS and even VA panels are performing just as well nowadays? Input lag was super low, there was a Native G-sync module for solid and reliable VRR performance, support for AMD FreeSync over DisplayPort, and the ever-popular variable overdrive as well to help ensure a simple and effective experience for gaming. ULMB worked well although it was probably only useful at 144Hz and nothing above. There’s also the usual wide range of gaming extras and options provided from a ROG Swift screen which were nice to see included.
Away from gaming we were really impressed with the screen’s performance for normal uses too. There’s a truly excellent factory calibration and setup which needs basically no adjustment or improvements. Contrast ratio was thankfully strong for an IPS panel at 1234:1 after calibration so it was a relief to see this hadn’t been sacrificed in favour of faster response times or other performance metrics. The screen is only a standard gamut model with sRGB colour space, so it lacks the punch and vividness of wider gamut options, but on the other hand is more well-suited to colour critical work and working with standard gamut content.
We think the main drawbacks that might put some people off is the small screen size of 24.5″ and the low resolution of only 1920 x 1080. It’s a step down from widely available 27″ 1440p screens and above, but then this isn’t really aimed at those segments anyway. It has a clear niche for gaming fanatics, esports players and those who actually prefer 1080p, a smaller screen and who want the latest and greatest gaming performance and refresh rates. Its size and resolution just make it a bit more limited for other uses we felt.
At the time of writing, the ROG Swift 360Hz PG259QN is available to order now in the UK from Overclockers UK in many regions from Amazon (affiliate links). It is also available in other regions and you can check latest availability and pricing using the link below.
Update 27/1/21 – there is an updated version of this screen also now available which has NVIDIA’s Reflex Latency Analyzer technology added. Everything else should be the same as in this review. That PG259QNR model is also available from Amazon in various regions and Overclockers UK (affiliate links).
| Pros | Cons |
| The highest refresh rate available at 360Hz and the fastest IPS response times we’ve seen | Small screen size by today’s standards |
| Native G-sync but also FreeSync supported for great VRR experience | Limited resolution at 1080p |
| Excellent factory setup and calibration | sRGB gamut only, missing some of the vividness of wide gamut options |
| Check Availability and Pricing – Affiliate Links |
|---|
| Amazon | Overclockers UK |
| TFTCentral is a participant in the Amazon Services LLC Associates Programme, an affiliate advertising programme designed to provide a means for sites to earn advertising fees by advertising and linking to Amazon.com, Amazon.co.uk, Amazon.de, Amazon.ca and other Amazon stores worldwide. We also participate in a similar scheme for Overclockers.co.uk. |
